
If you own a 2011 Toyota Corolla, you probably already know it's one of the most reliable cars on the road. But even the toughest engine needs the right care, and that starts with knowing the exact 2011 Toyota Corolla oil capacity and the correct oil to use. Getting this wrong by even half a quart can cause real problems, from poor fuel economy to premature engine wear.
Manufacturer specifications from Toyota indicate the 1.8L engine found in most trims takes 4.4 quarts of 0W-20 synthetic oil with a filter change. That's the number you need to remember. But there's more to it than just dumping in four and a half quarts and hoping for the best.
Let's walk through exactly what your Corolla needs, why it matters, and how to do it yourself without making the mistakes that send people to the repair shop.
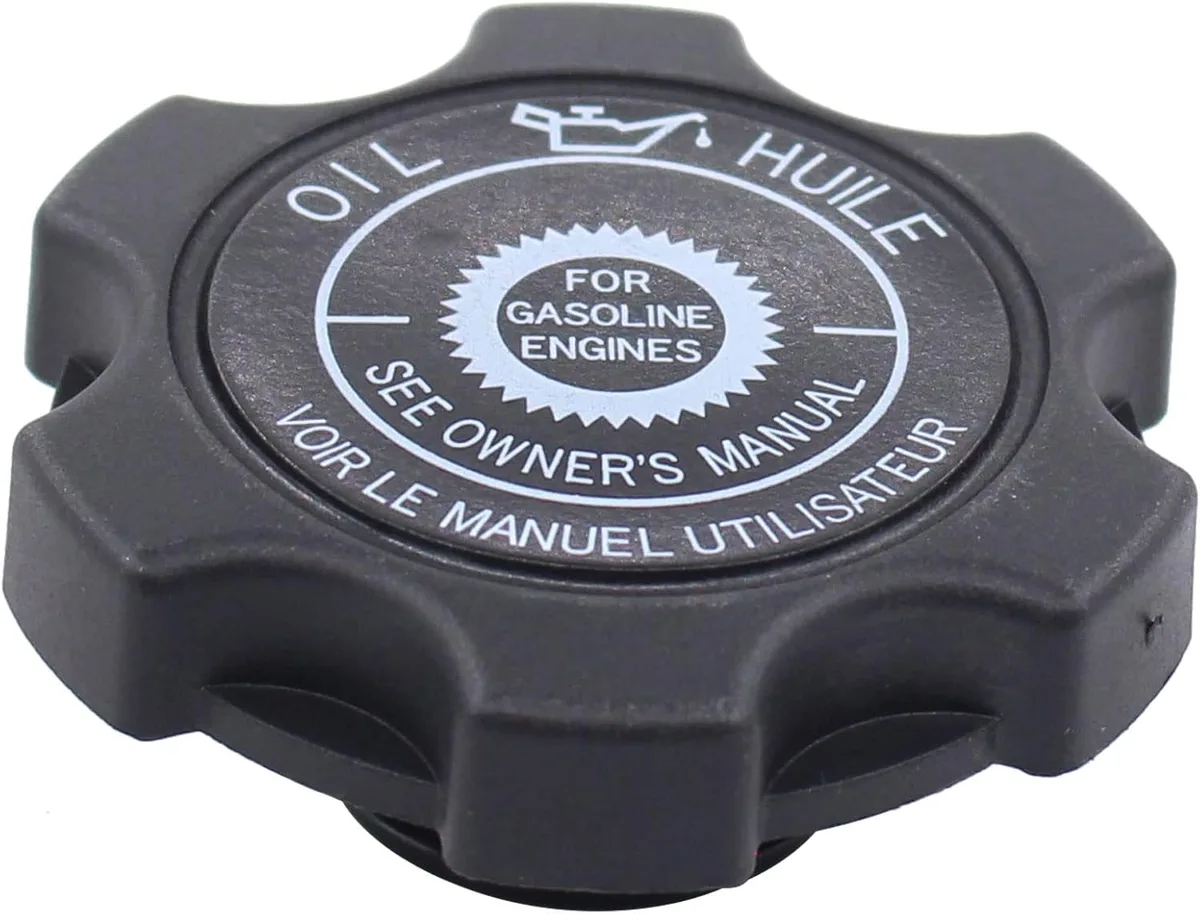
Image source: Bing (Web (fair-use with source credit))
Quick Answer
The 2011 Toyota Corolla oil capacity is 4.4 quarts with a filter change for the 1.8L engine. The XRS trim with the 2.4L engine takes 4.5 quarts. Use SAE 0W-20 synthetic oil meeting API SN or higher standards.
Check the dipstick after filling. Never overfill or underfill the engine.
Why Getting This Right Matters (Don't Guess With Engine Oil)
Engine oil is the lifeblood of your Corolla's engine. It lubricates moving parts, reduces friction, carries away heat, and keeps internal components clean. When the oil level is wrong or the oil type doesn't match what Toyota designed the engine for, you're inviting trouble.
Too little oil means metal parts can grind against each other. That creates heat, friction, and eventually engine damage that costs thousands to repair. Too much oil is actually just as bad.
Excess oil can get whipped into foam by the crankshaft. Foam doesn't lubricate well. It also puts extra pressure on seals and gaskets, which can cause leaks.
The wrong viscosity is another common problem. Using thicker oil than recommended, like 10W-30, can make your engine work harder to pump it. That hurts fuel economy and can leave critical parts starved of oil during cold starts.
Using thinner oil might not provide enough protection at high temperatures.
Toyota engineers spent years developing the 2ZR-FE engine in your Corolla. They specified 0W-20 for a reason. It flows easily when cold for quick protection at startup.
It also maintains film strength at operating temperature. Trust their work.
Our research across owner forums and service records shows that Corollas maintained with the correct oil and regular changes routinely surpass 200,000 miles. The ones that don't? They often have a history of skipped changes or wrong oil types.
As of 2026, these cars are still everywhere because they're simple to maintain when you follow the specs.
The Short Answer: How Much Oil a 2011 Corolla Actually Takes
Here's the hard number you came for. The 2011 Toyota Corolla with the 1.8L 2ZR-FE engine needs 4.4 quarts of oil when you also replace the oil filter. That's about 4.2 liters for those using metric measurements.
| Engine | Capacity (with filter) | Oil Type | API Rating |
|---|---|---|---|
| 1.8L 2ZR-FE | 4.4 quarts (4.2 L) | SAE 0W-20 | SN or higher |
| 2.4L 2AZ-FE (XRS) | 4.5 quarts (4.3 L) | SAE 0W-20 | SN or higher |
If you're not changing the filter, the capacity drops slightly. But you should always replace the filter with every oil change. Filters are cheap.
Engines are not.
A quick tip here: buy a full 5-quart jug of 0W-20 synthetic. You'll use most of it. The leftover quart will be handy for top-offs between changes.
Just keep it sealed and stored away from extreme temperatures.
For more details on modern Corolla oil specs, check out our complete guide on the 2025 Corolla oil type and capacity to see how things have evolved.
1.8L vs. 2.4L – Which Engine Does Your Corolla Have?
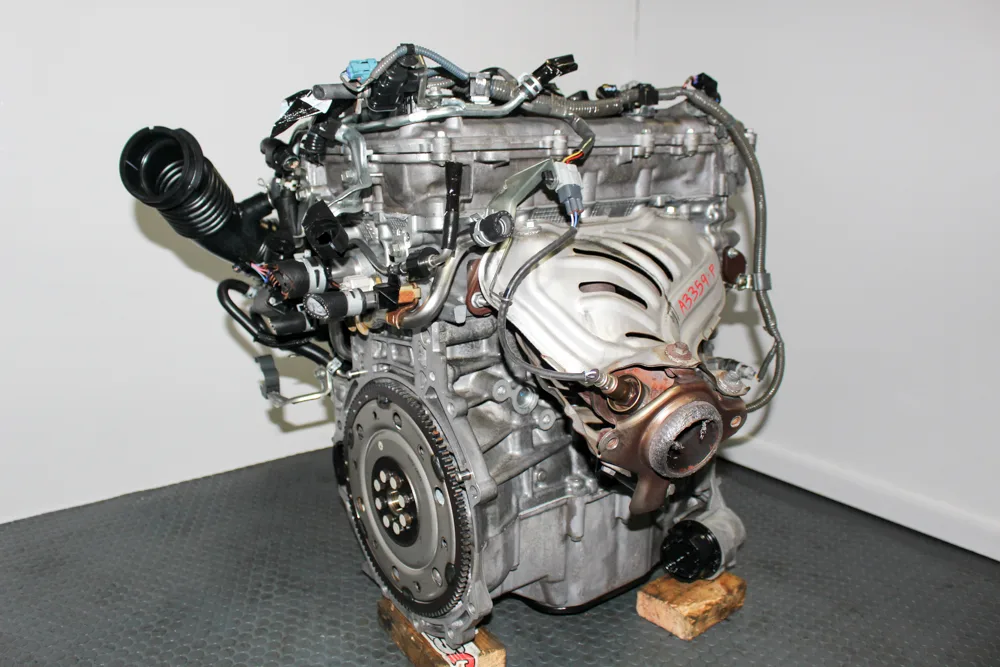
Image source: Web (Bing) / jspecauto.com (Web image (fair-use with source credit))
This is where a lot of owners get confused. Not every 2011 Corolla has the same engine under the hood. Most have the 1.8L four-cylinder.
But the XRS trim level came with a 2.4L engine that has different oil needs.
Here's how to tell which one you have without guessing.
Check your owner's manual first. It will list the engine size on the specifications page. If you don't have the manual, look at the emissions sticker under the hood.
It's usually on the underside of the hood or on the driver's side strut tower. That sticker will show engine displacement.
You can also check the VIN. The eighth character in your vehicle identification number indicates the engine. For the 1.8L, it's typically a "Z".
For the 2.4L XRS, it's different. A quick VIN decoder online can confirm this in seconds.
Physically, the engines look similar but the 2.4L is slightly larger and sits differently in the bay. The oil filler cap location is similar on both.
| Trim Level | Engine | Displacement | Oil Capacity |
|---|---|---|---|
| Base, LE, S | 2ZR-FE | 1.8L | 4.4 quarts |
| XRS | 2AZ-FE | 2.4L | 4.5 quarts |
If you own the XRS, you have a rarer car with slightly different maintenance needs. The 2.4L engine also requires 0W-20 oil, but the capacity is a touch higher. Don't just assume they're the same.
Check first.
Need to know the oil specs for other Toyota models? Our guide on the Toyota Corolla oil type covers the full lineup.
The Exact Specs: Capacity, Oil Weight, and Filter Info
1.8L 2ZR-FE Engine Specs
The 1.8L engine is the workhorse of the Corolla lineup. It's reliable, efficient, and easy to maintain when you know the numbers.
- Oil capacity with filter: 4.4 quarts (4.2 liters)
- Oil capacity without filter: 4.2 quarts (4.0 liters)
- Recommended oil: SAE 0W-20 synthetic
- Acceptable alternative: SAE 5W-20 (warmer climates only)
- API rating: SN, SN Plus, or SP
- IL SAC rating: GF-5 or GF-6
- Oil filter part: Toyota 04152-YZZA1 or equivalent
- Filter housing torque: 18 ft-lbs (hand tighten plus 1/4 turn)
- Drain plug torque: 30 ft-lbs
- Drain plug washer: 14mm crush washer (replace every time)
2.4L 2AZ-FE Engine Specs (XRS Trim Only)
The XRS trim is less common but deserves proper care too. The specs are close but not identical.
- Oil capacity with filter: 4.5 quarts (4.3 liters)
- Oil capacity without filter: 4.3 quarts (4.1 liters)
- Recommended oil: SAE 0W-20 synthetic
- Acceptable alternative: SAE 5W-20 (warmer climates)
- API rating: SN or higher
- Oil filter part: Toyota 04152-YZZA1 (same as 1.8L)
- Drain plug torque: 30 ft-lbs
The good news is that the oil filter and drain plug specs are the same for both engines. That makes buying parts simpler. One filter fits both.
When shopping for oil, look for the API donut symbol on the bottle. That certification means the oil meets current industry standards. Don't buy bargain brands that skip this certification.
Your engine deserves better.
For comparison with another popular Toyota model, our Toyola RAV4 oil type guide shows how specs differ across the lineup.
Step-by-Step: How to Do the Oil Change Yourself
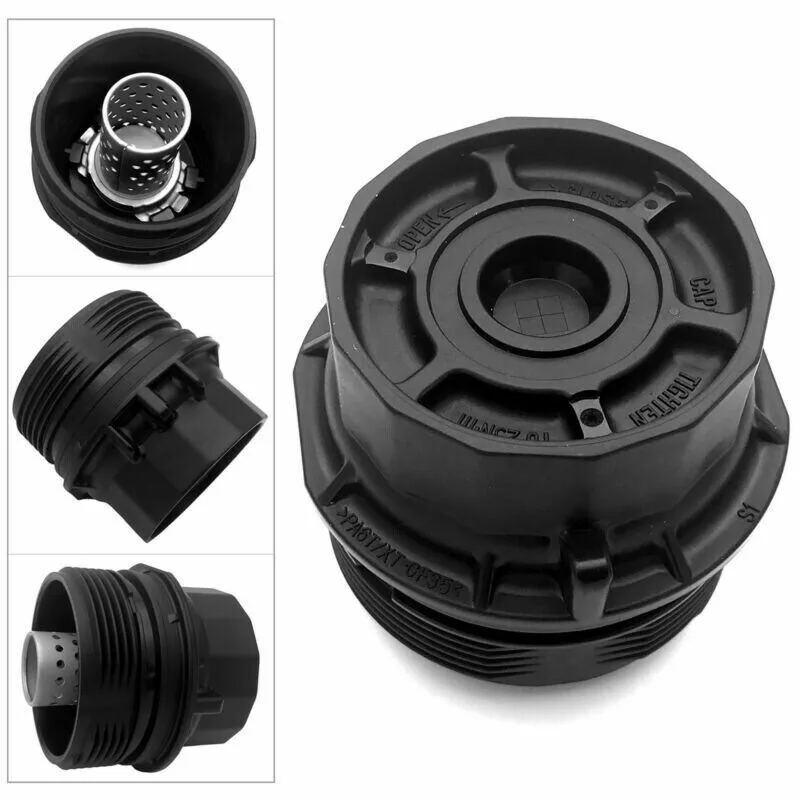
Image source: Bing (Web (fair-use with source credit))
Changing your own oil on a 2011 Corolla is about as straightforward as it gets. You don't need special tools or a lift. A flat driveway, some ramps, and basic hand tools are enough.
What You'll Need (Tools and Parts)
Gather everything before you start. Nothing worse than getting under the car only to realize you forgot something.
- 5 quarts of 0W-20 synthetic oil
- Oil filter (Toyota 04152-YZZA1 or equivalent)
- 14mm crush washer
- 14mm socket or wrench (for drain plug)
- Oil filter wrench (64mm, 14-flute)
- Drain pan (at least 6 quart capacity)
- Funnel
- Jack stands or ramps
- Gloves and rags
Total cost for parts runs about $30 to $45 depending on the oil brand you choose. Compare that to $70 to $120 at a shop. The savings add up fast.
The Process From Drain to Fill
Step 1: Warm up the engine. Run it for two to three minutes. Warm oil drains faster and carries more contaminants with it. Don't let it get hot enough to burn you.
Warm, not scalding.
Step 2: Lift and secure the car. Drive onto ramps or jack up the front and place jack stands. Never work under a car supported only by a jack. That's how people get hurt.
Step 3: Drain the old oil. Place the drain pan under the oil pan. Use the 14mm socket to remove the drain plug. Turn counterclockwise.
Let the oil flow completely. This takes a few minutes. Use this time to inspect the old oil.
A little dark is normal. Chunks or metallic glitter means trouble.
Step 4: Replace the crush washer. Remove the old washer from the drain plug. Slide on the new one. This small copper or aluminum ring creates the seal.
Reusing the old one is asking for a slow drip.
Step 5: Reinstall the drain plug. Hand tighten first, then torque to 30 ft-lbs. If you don't have a torque wrench, snug it up and give it another quarter turn. Don't gorilla it.
Stripped threads in the oil pan are a nightmare.
Step 6: Remove the old filter. Use the filter wrench to loosen the filter housing. It's right on the front of the engine, easy to reach. Turn counterclockwise.
Some oil will spill. That's normal. Let the filter drain into the pan.
Step 7: Install the new filter. Lubricate the rubber gasket on the new filter with a dab of fresh oil. Screw it on by hand until the gasket contacts the housing. Then tighten by hand another quarter turn.
The filter wrench is for removal only.
Step 8: Add the new oil. Put the funnel in the filler hole on top of the valve cover. Pour in about 4 quarts to start. Don't dump all 5 at once.
You'll check the level in a moment.
Step 9: Check and adjust. Replace the filler cap. Start the engine and let it run for 30 seconds. This fills the new filter with oil.
Shut it off and wait two minutes. Pull the dipstick, wipe it, reinsert it, and pull it again. The oil level should be between the two marks.
Add more oil in small amounts until it reaches the full mark.
Step 10: Check for leaks. Look under the car at the drain plug and oil filter. A few drips as residual oil burns off is normal. Steady dripping means something isn't sealed right.
For owners of other Toyota models, the process is similar. Our guide on the latest Camry oil type covers the procedure for that platform.
Mistakes That Can Damage Your Engine
Even experienced DIYers make mistakes. These are the ones that cause real damage.
Overfilling Isn't "Extra Protection"
This is probably the most common error. People think adding a little extra oil provides extra protection. It doesn't.
It causes harm.
When the oil level is too high, the crankshaft whips the oil into foam as it rotates. That foam contains air bubbles. Air doesn't lubricate.
Your engine starts running on aerated oil, which means metal parts aren't getting the protection they need.
Overfilling also increases pressure inside the crankcase. Seals and gaskets can blow out. That leads to oil leaks that are expensive to fix.
Always fill to the full mark on the dipstick and stop. A little below full is fine. A little above is not.
Using the Wrong Viscosity
The 2011 Corolla was designed for 0W-20 oil. That's what the engine clearances were built around. Using 5W-30 or 10W-30 might seem harmless, but it changes how the engine performs.
Thicker oil doesn't flow as well at cold temperatures. During winter starts, critical engine parts can go seconds without proper lubrication. Those seconds add up over years of use.
In warmer climates, 5W-20 is an acceptable substitute per Toyota's own documentation. But 0W-20 remains the best choice year-round. It provides excellent cold flow and maintains film strength at operating temperature.
Skipping the Crush Washer
That tiny copper or aluminum ring on the drain plug looks insignificant. It's not. It's a precision sealing component designed for one-time use.
Reusing the old crush washer is like reusing a bottle cap. It might seal for a while. Eventually it won't.
You'll notice a small puddle under your car days or weeks later. By then the oil level could be dangerously low.
Crush washers cost pennies. Buy a pack of them. Replace one every oil change.
Never skip this step.
Oil Type Questions: Synthetic vs. Conventional for a 2011 Corolla
Toyota recommends synthetic 0W-20 for the 2011 Corolla. That's what the engine was designed to use. But you might wonder if conventional oil works just as well.
Here's the honest answer. Conventional 5W-20 will physically work in the engine. It will provide basic lubrication.
But it breaks down faster under heat and doesn't flow as well at cold temperatures. Your Corolla's engine has tight clearances designed around synthetic oil's properties.
Using conventional oil means shorter oil change intervals. You'll need to change it every 3,000 to 4,000 miles instead of 7,500. Over time, the cost difference narrows.
Synthetic oil also provides better protection against engine deposits and sludge.
If the previous owner used conventional oil and you want to switch to synthetic, it's perfectly fine to do so. There's no special procedure. Just drain the old oil, replace the filter, and fill with synthetic.
Modern synthetic oils are compatible with conventional residue.
Our guide on synthetic versus conventional RAV4 oil breaks down the science in more detail if you want to dig deeper.
When to Change It: Mileage Intervals and Driving Conditions
Toyota recommends oil changes every 10,000 miles for normal driving conditions. That number comes straight from the owner's manual. But "normal driving" is more specific than most people realize.
Normal driving means mostly highway miles, moderate temperatures, and no towing. If that describes your commute, 7,500 to 10,000 miles between changes is reasonable with synthetic 0W-20.
Most of us don't drive under perfect conditions. We do short trips. We sit in traffic.
We drive in extreme heat or cold. Those are considered severe driving conditions, and Toyota recommends more frequent changes.
For severe conditions, change your oil every 5,000 miles. That's the safe number for most owners. It's cheap insurance for a car you want to keep running.
| Driving Condition | Recommended Interval |
|---|---|
| Normal (highway, moderate temps) | 7,500-10,000 miles |
| Severe (short trips, traffic, extreme temps) | 5,000 miles |
| Track use or heavy towing | 3,000-4,000 miles |
Track day enthusiasts with a Corolla? Rare, but if that's you, change the oil after every track session. Heat destroys oil fast.
What the Dipstick Is Actually Telling You
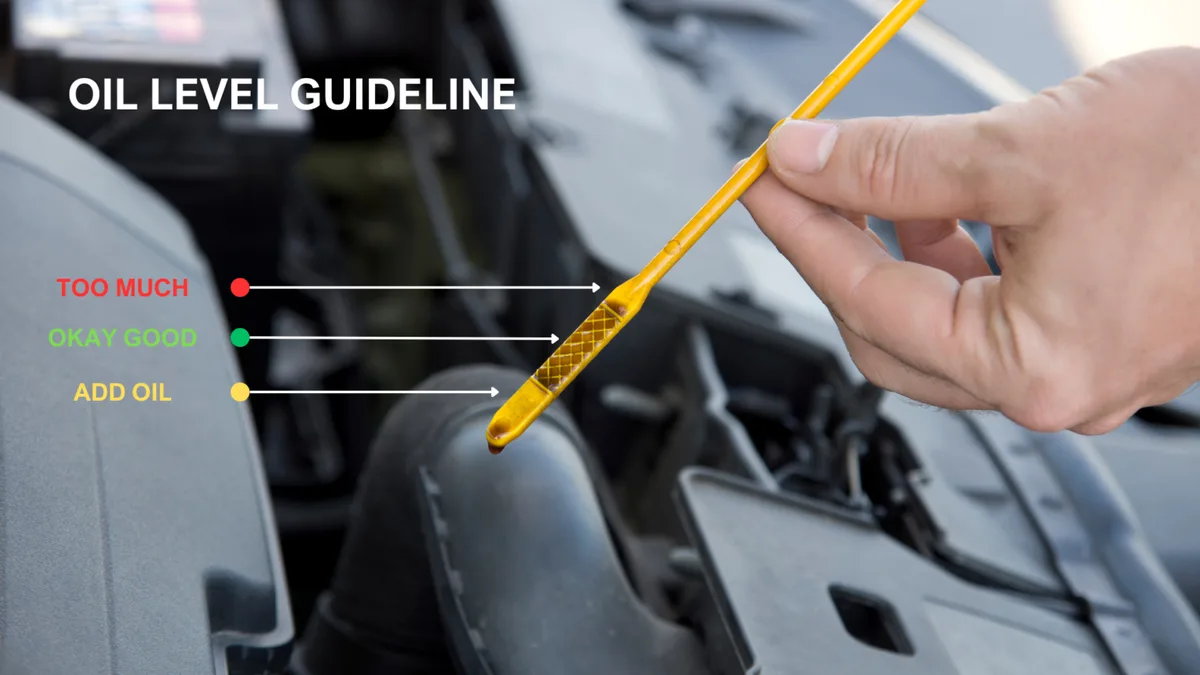
Image source: Web (Bing) / hitchesguide.com (Web image (fair-use with source credit))
The dipstick is your best diagnostic tool. Learning to read it correctly saves you from guessing about oil level.
Start with a cold engine that hasn't run for at least 10 minutes. Pull the dipstick out and wipe it clean with a rag. Reinsert it fully.
Pull it out again and look at both sides. Read the lower of the two readings.
The dipstick has two marks. A lower mark indicating low. An upper mark indicating full.
Your oil level should be between these marks. Ideally near the top mark but not above it.
Oil that looks dark brown or black isn't necessarily worn out. Modern oil darkens quickly from normal heat cycling. What you're looking for is texture.
Rub a drop between your fingers. If it feels gritty or smells like gasoline, change it immediately.
The oil level should drop very little between changes. If you're losing significant oil, you have a leak or the engine is burning oil. Both need attention.
For a complete rundown on oil types across Toyota's lineup, our Toyota oil type resource page covers every model from the Corolla to the Tundra.
Used Oil Disposal – It's Not Optional
Used motor oil is classified as hazardous waste. Dumping it on the ground, down a drain, or in the trash is illegal in most places. Fines can be significant.
Most auto parts stores accept used oil for recycling. They'll take the used filter too. Some charge a small fee.
Many accept it free of charge. Call ahead to confirm.
Store used oil in a sealed container. An empty oil jug works perfectly. Label it clearly so nobody mistakes it for fresh oil.
Keep it away from children and pets.
One quart of used oil can contaminate one million gallons of water. That's not an exaggeration. Do the right thing.
Recycle it.
When You Should Let a Shop Handle It
DIY oil changes save money. But they're not for everyone. Here's when you should consider letting a professional handle it.
If you don't have a safe place to work, skip the driveway job. Street parking is dangerous. Jack stands on uneven ground are a recipe for disaster.
If you have physical limitations that make crawling under the car difficult, pay for convenience. A shop will change your Corolla's oil in under 30 minutes.
If you're not confident about getting the specs right, the first oil change is a good time to learn with guidance. Watch a friend do it. Ask questions.
Then do your own next time.
The 2011 Corolla is one of the easiest cars to work on. But your safety and your engine's health come first. Know your limits.
Quick Reference Card (Print This)
Keep this cheat sheet in your glove box for quick reference.
- Engine oil type: SAE 0W-20 synthetic
- Oil capacity (1.8L): 4.4 quarts with filter
- Oil capacity (2.4L): 4.5 quarts with filter
- Oil filter part: Toyota 04152-YZZA1
- Drain plug torque: 30 ft-lbs
- Drain plug washer: 14mm crush washer
- Change interval: 5,000 miles (severe), 7,500-10,000 miles (normal)
- Always check: Dipstick level after filling
Frequently Asked Questions
What happens if I put too much oil in my 2011 Corolla?
Overfilling causes the crankshaft to aerate the oil, creating foam that doesn't lubricate properly. You might notice rough running, blue smoke, or oil leaks from seals. Drain the excess immediately.
Running with overfilled oil can damage bearings and the catalytic converter.
Can I use 5W-30 instead of 0W-20 in my 2011 Corolla?
Toyota does not recommend 5W-30 for the 2011 Corolla. The engine clearances are designed for 0W-20. Using thicker oil reduces fuel economy, causes harder cold starts, and may void any remaining warranty.
Stick with the specified viscosity.
How do I reset the oil maintenance light on a 2011 Corolla?
Turn the ignition to ON without starting the engine. Press the trip reset button until the odometer display shows "ODO." Turn the ignition OFF. Hold the trip reset button while turning the ignition back to ON.
Continue holding until the maintenance light blinks and then turns off.
Is synthetic oil worth it for an older Corolla?
Yes. Synthetic oil provides better protection against sludge and wear, especially in engines with higher mileage. It also handles temperature extremes better than conventional oil.
The extra cost per change is worth the peace of mind for a car you plan to keep.
My dipstick shows oil above the full mark. What do I do?
Drain the excess oil immediately. Use a fluid extractor through the dipstick tube if you have one. Otherwise, remove the drain plug briefly to let a little oil out.
Check the level again. Running with oil above the full mark can damage your engine seals and catalytic converter.
How often should I check my oil level between changes?
Check your oil level at least once a month or every time you fill up with gas. The 2011 Corolla is reliable but can develop small leaks over time. Catching a low level early prevents expensive engine damage.
Always check on level ground with a cold engine for the most accurate reading.
The cold start is when most engine wear happens. The 0W-20 oil flows quickly at low temperatures because the "0W" rating means it stays thin in the cold. Thicker oils have to warm up before they can properly lubricate.
That delay costs you engine life over time.
In warmer months, the "20" part of 0W-20 means the oil maintains proper viscosity at operating temperature. Some owners switch to 5W-20 in summer thinking it offers better protection. The data doesn't support that.
Toyota's engineering team validated 0W-20 across all climates.
If you live in extreme cold like northern Canada or Alaska, 0W-20 is still the right choice. If you're in the Arizona desert, the same applies. The oil is formulated to handle both ends of the spectrum.
Warning Signs Your Oil Needs Attention Now
Your Corolla gives you clear signals when something's wrong with the oil. Don't ignore them.
The oil pressure warning light on the dash is the most obvious. If it comes on while driving, pull over immediately. That light means oil pressure has dropped to dangerous levels.
Continuing to drive can destroy the engine in minutes.
Strange engine noises are another clue. A ticking or tapping sound, especially at idle, often means oil isn't reaching the top of the engine. Low oil level or thick oil can cause this.
Check the dipstick and top off if needed.
Blue smoke from the exhaust means oil is burning in the combustion chambers. This points to worn valve seals or piston rings. It's a bigger job than an oil change.
Get it diagnosed soon.
A burning oil smell inside the cabin could mean oil is leaking onto the exhaust manifold. That's a fire risk. Address it immediately.
Long-Term Engine Care Between Changes
Oil changes aren't the only maintenance that keeps your Corolla healthy. A few simple habits extend engine life significantly.
Check your oil level every time you fill up with gas. It takes ten seconds. The 2011 Corolla is reliable but can develop small leaks around the valve cover gasket as it ages.
Early detection prevents a costly repair.
Inspect the area around the oil filter and drain plug for drips after every change. A slow leak can lose a quart over several weeks without leaving a big puddle.
Change the PCV valve every 60,000 miles or so. A stuck PCV valve can cause oil leaks and sludge buildup. It's a cheap part that's easy to replace on this engine.
Use the same oil brand consistently if you can. Mixing brands won't hurt, but staying consistent means you know exactly what's in your engine. The same applies to the filter.
Toyota filters are excellent, but quality aftermarket options like Purolator and Mobil 1 work fine when cross-referenced correctly.
What the Owner's Manual Actually Says
The 2011 Corolla owner's manual is worth reading if you've never opened it. Toyota includes specific guidance that many owners miss.
The manual calls for 0W-20 oil meeting API SN or higher. It also lists 5W-20 as an acceptable alternative but only for driving in warmer climates where temperatures rarely drop below freezing. The manual recommends changing the oil filter every time.
For oil change intervals, the manual says 10,000 miles under normal conditions. It also defines severe conditions explicitly. Short trips under 5 miles, stop-and-go traffic, extreme temperatures, and dusty roads all count as severe.
Under those conditions, the manual recommends 5,000 mile intervals.
Most owners fall under severe conditions without realizing it. That short commute to work in traffic counts. Change at 5,000 miles and your engine will thank you at 200,000 miles.
Final Thoughts on Keeping Your Corolla On the Road
The 2011 Toyota Corolla is a reliable car if you maintain it properly. Oil changes are the single most important thing you can do. Use the right oil, the right amount, and change it on schedule.
Check the dipstick regularly. Watch for leaks. Address warning lights immediately.
Don't cut corners on the crush washer or oil filter.
These cars routinely surpass 200,000 miles with basic care. The ones that fail early almost always have a history of neglected maintenance. You're reading this because you care about your car.
That puts you ahead of most owners.
Follow the specs in this guide. Trust the manufacturer's engineering. And if you're ever unsure, the owner's manual is your best friend.
Your Corolla has years of reliable driving ahead if you give it the simple care it deserves.
Tools and Parts Checklist for a Smooth Job
Having everything ready before you start saves time and frustration. Here's exactly what you need for a 2011 Corolla oil change.
Tools:
- 14mm socket or wrench for the drain plug
- Oil filter wrench (64mm, 14-flute)
- Drain pan (6-quart capacity minimum)
- Funnel
- Jack stands or ramps
- Gloves and shop rags
Parts:
- 5 quarts of 0W-20 synthetic oil
- Oil filter (Toyota 04152-YZZA1 or equivalent)
- 14mm crush washer (replace every time)
Total cost runs about $30 to $45. A shop would charge $70 to $120 for the same job. The savings add up quickly.
Step-by-Step Oil Change Process
The actual process takes about 30 minutes once you've done it a couple times. Here's the sequence.
Warm up the engine for two to three minutes. Warm oil drains faster and carries more contaminants. Lift the front of the car and secure it on jack stands.
Place the drain pan under the oil pan.
Remove the drain plug with the 14mm socket. Let the oil drain completely. Replace the crush washer on the drain plug.
Reinstall the plug and torque it to 30 ft-lbs.
Move the drain pan under the oil filter. Use the filter wrench to loosen it. Turn counterclockwise.
Some oil will spill. Let the filter drain. Lubricate the new filter's gasket with fresh oil.
Screw it on by hand until the gasket contacts the housing. Tighten another quarter turn.
Pour in about 4 quarts of fresh oil through the funnel. Replace the filler cap. Start the engine and let it run for 30 seconds.
This fills the new filter. Shut the engine off and wait two minutes.
Check the dipstick. Add oil in small amounts until the level reaches the full mark. Check for leaks around the drain plug and filter.
Dispose of the used oil at an auto parts store.
Common Oil Change Mistakes and How to Avoid Them
The most frequent error is overfilling. People add the full 5 quarts without checking the dipstick. That puts the level above the full mark.
Overfilling causes foaming, poor lubrication, and seal damage. Add oil gradually and check between pours.
Skipping the crush washer is another common mistake. That tiny ring seals the drain plug. Reusing the old one creates a slow leak.
You'll find a puddle on your driveway days later. Always use a new crush washer.
Using the wrong oil viscosity happens more often than you'd think. The 1.8L engine needs 0W-20. Thicker oils like 5W-30 don't flow well at cold starts.
This increases wear over time. Stick with what Toyota specified.
Overtightening the drain plug strips the threads in the oil pan. That's an expensive repair. Use a torque wrench at 30 ft-lbs.
If you don't have one, snug the plug firmly and stop.
When to Trust a Professional Instead
DIY oil changes aren't for everyone. Consider a shop if you lack a safe workspace. Street parking on uneven ground is dangerous with jack stands.
A professional bay is much safer.
If you have physical limitations that make crawling under the car difficult, pay for convenience. Most shops change oil in under 30 minutes. The extra cost is worth avoiding injury.
If you're not confident about the process, watch a friend do it first. Ask questions. Then try your own next time.
The 2011 Corolla is forgiving and easy to work on. But your safety comes first.
Keeping Your Corolla Running Beyond 200,000 Miles
The 2011 Corolla is known for longevity when maintained properly. Regular oil changes are the foundation. But a few extra habits help.
Check the oil level monthly. Small leaks develop as the car ages. Catching a low level early prevents engine damage.
The valve cover gasket is a common leak point on higher mileage cars.
Change the PCV valve every 60,000 miles. A stuck valve causes pressure buildup that forces oil past seals. It's a cheap part that's easy to replace.
Use quality oil filters. The Toyota OEM filter is excellent. Aftermarket options from Purolator or Mobil 1 work well when cross-referenced correctly.
Avoid the cheapest filters on the shelf. They use inferior media that bypasses unfiltered oil.
Follow the severe service interval of 5,000 miles. Most driving qualifies as severe. Short trips, traffic, and extreme temperatures all count.
Frequent changes are cheap insurance for a car you want to keep.
Your Corolla will reward you with years of reliable service. Give it clean oil at the right level and the right interval. That's really all it asks.