
If you own a 2010 Toyota Highlander, getting the oil change right is one of the best things you can do for the engine. But here's the thing, the 2010 toyota highlander oil capacity isn't one simple number. It depends entirely on which engine is under the hood, and using the wrong amount can cause real damage.
Manufacturer specifications indicate two completely different fill volumes depending on whether you have the 2.7L four-cylinder or the 3.5L V6. Mix them up and you'll either starve the bearings of oil or foam the crankcase until pressure drops. Neither outcome is cheap to fix.
Let's walk through exactly what you need to know before you pop that hood.
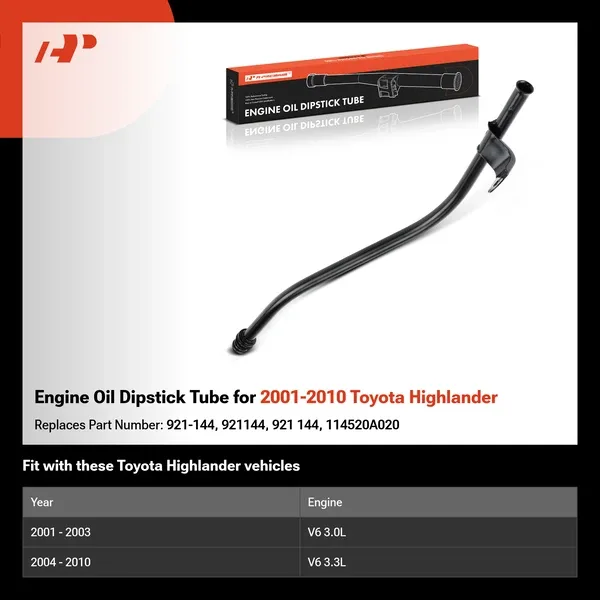
Image source: Web (Bing) / a-premium.com (Web image (fair-use with source credit))
Quick Answer
2.7L 4-cylinder (1AR-FE): 4.5 quarts with filter.
3.5L V6 (2GR-FE): 6.4 quarts with filter.
Oil type: SAE 0W-20, API SL/SM/SN or ILSAC GF-4/GF-5.
That's the short version. Keep reading for the details that keep your engine running smoothly past 200,000 miles.
Why Getting the Oil Capacity Wrong Can Cost You an Engine
You might think a quart off either way is no big deal. It is. Modern engines run tight tolerances, and the oil system is designed around a specific volume of fluid circulating at a specific pressure.
Overfill the crankcase and the spinning crankshaft whips the oil into foam. Foam doesn't pump well. Air bubbles get into the bearings and hydraulic lifters, which means metal-on-metal contact that generates heat and wear fast.
Too much oil also pressurizes the crankcase seals, which leads to leaks that are a pain to track down.
Underfill is just as bad. Low oil level means the pickup tube can suck air during hard cornering, steep inclines, or even a quick stop. That air pocket kills oil pressure instantly.
The low-pressure warning light might come on, but by then the damage to rod and main bearings is already done.
Per SAE testing standards, most passenger car engines lose about 30 percent of their expected lifespan when operated consistently one quart low. That is thousands of miles you are leaving on the table.
The 2010 Highlander uses two very different engines. You need to know which one you own before you buy a single quart of oil.
The Two Engines, Two Completely Different Capacities
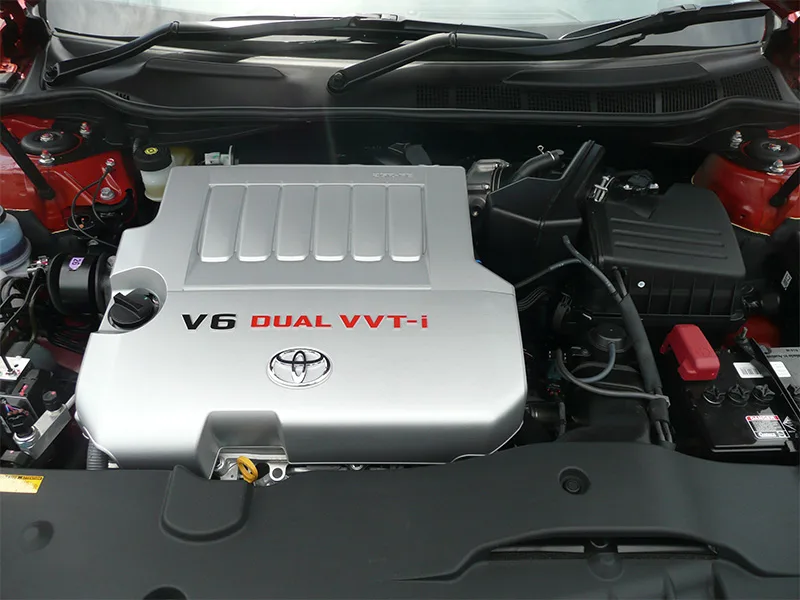
Image source: Bing (Web (fair-use with source credit))
The 2010 Highlander came with two engine options, and they do not share oil capacities. Not close.
2.7L 4-Cylinder (1AR-FE) – 4.5 Quarts
This is the base engine. It is a four-cylinder with an iron block and aluminum head, designed for fuel economy. It takes 4.5 US quarts of oil with a filter change.
Without a filter change, the capacity drops slightly to about 4.2 quarts, but you should always change the filter when you change the oil. There is no good reason to skip it.
The 2.7L uses a cartridge-style oil filter located on the front of the engine, accessible from underneath. Some owners report that this engine can show a little oil consumption as it ages. If yours uses oil between changes, check the dipstick more often.
Running a quart low on a four-cylinder that already holds only 4.5 quarts means you are losing over 20 percent of your oil volume. That is dangerous.
3.5L V6 (2GR-FE) – 6.4 Quarts
The 3.5L V6 is the more common engine in the 2010 Highlander. It is also the one that causes the most confusion about capacity.
This engine takes 6.4 quarts with a filter change.
Earlier online sources and some printed manuals said 6.1 quarts, but Toyota issued a service bulletin correcting that figure. The 6.4-quart number accounts for the oil filter's capacity and the slight redesign of the oil pan on later production runs. If you fill to 6.1 quarts, you will be slightly under the full mark on the dipstick.
That is not catastrophic, but it means you are not getting the full benefit of the oil system's designed volume.
The V6 uses a spin-on oil filter located on the front of the engine, accessible from above. That makes it easier to change than the 2.7L cartridge filter. The V6 also has a large oil pan capacity, which helps keep oil temperatures down during sustained highway driving or towing.
As of 2026, these engines are still on the road in large numbers. Getting the oil capacity right is one of the simplest ways to keep them there.
| Engine | Displacement | Capacity (with filter) | Oil Type | Filter Type |
|---|---|---|---|---|
| 1AR-FE | 2.7L I4 | 4.5 quarts | 0W-20 | Cartridge |
| 2GR-FE | 3.5L V6 | 6.4 quarts | 0W-20 | Spin-on |
Oil Type Matters Just as Much as the Amount
Using the right volume is half the battle. The other half is using the right oil.
Why Toyota Specifies 0W-20 (and When 5W-20 Is OK)
Toyota designed the 1AR-FE and 2GR-FE engines around SAE 0W-20 viscosity. That is the recommended oil for nearly all driving conditions. The "0W" means the oil stays thin enough to circulate at cold startup temperatures.
The "20" means it maintains enough film strength at operating temperature to protect bearings and piston rings.
The 0W-20 specification helps fuel economy. Toyota reported a measurable improvement when switching from 5W-30 in earlier generations to 0W-20 in the 2010 model year. The difference is real, especially in stop-and-go city driving where the engine spends more time warming up.
If 0W-20 is not available, Toyota allows 5W-20 as an acceptable substitute. This is listed in the owner's manual. Do not use 5W-30 or 10W-30 unless you are in an extreme heat environment and have no other option.
Thicker oil reduces flow at startup, increases engine drag, and can trigger the variable valve timing system to respond more slowly.
API and ILSAC Ratings You Need to Look For
Look for the API "Starburst" certification mark on the bottle. That means the oil meets API SL, SM, or SN standards. These ratings ensure the oil has the right anti-wear additives, detergents, and oxidation stability for gasoline engines built after 2004.
ILSAC GF-4 or GF-5 certification is the same thing under a different name. The ILSAC standard includes additional fuel economy and piston deposit protection tests. Most major brand 0W-20 oils carry both certifications.
Synthetic oil is not strictly required, but it is strongly recommended. The 0W-20 viscosity is nearly always a synthetic blend or full synthetic formulation. Conventional oil in 0W-20 is rare and typically does not meet the same volatility standards.
Synthetic oil resists thermal breakdown better, especially in the V6 which runs hotter during highway cruising.
The Right Tools and Parts for the Job
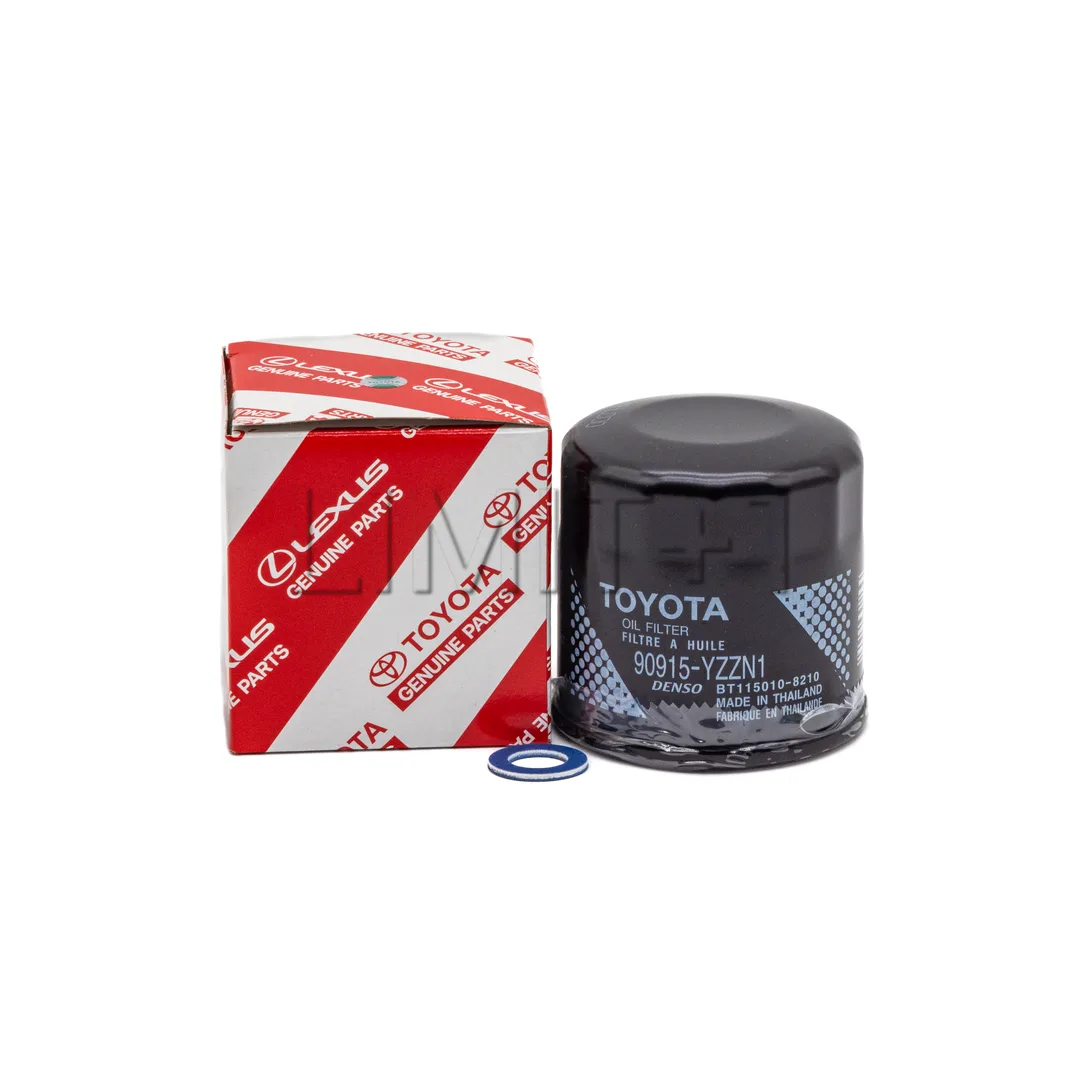
Image source: Web (Bing) / limitplus1.com (Web image (fair-use with source credit))
Before you start, gather everything you need. Running to the parts store mid-job with a draining oil pan under the car is no fun.
Oil Filter Options
For the 2.7L four-cylinder, you need a cartridge-style filter. The OEM Toyota part is the most reliable choice, but quality aftermarket brands from Purolator, Mobil 1, or Wix work well. Avoid the cheapest no-name cartridge you find.
The filter media quality matters for long oil change intervals.
For the 3.5L V6, you need a spin-on filter. The thread size is M20 x 1.5. The OEM filter has a part number printed right on the side, but you can cross-reference at any auto parts store.
A quality filter with a silicone anti-drainback valve is worth the extra dollar or two.
Crush Washer
The drain plug uses a copper or aluminum crush washer. These are one-time-use parts. Reusing a crushed washer increases the chance of a slow drip that you might not notice until the oil level drops.
The washer is cheap. Buy a pack of ten and keep them in the glove box. The drain plug size is 14mm, and the torque spec is 29 ft-lbs.
Other Tools
- 14mm socket or wrench for the drain plug
- Oil filter wrench (for spin-on filters on the V6)
- Drain pan (at least 8 quarts capacity for the V6)
- Funnel
- Rags or shop towels
- Torque wrench (optional but recommended)
Using a torque wrench on the drain plug prevents stripping the oil pan threads. The pan is aluminum and easy to damage if you over-tighten with a breaker bar.
Step-by-Step Oil Change for the 2010 Highlander
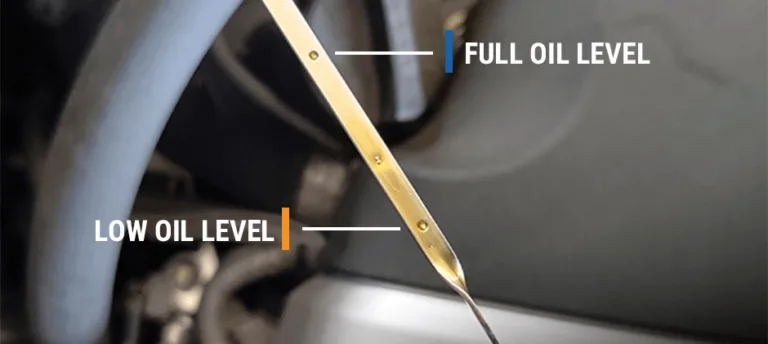
Image source: Bing (Web (fair-use with source credit))
The actual process is straightforward, but a few details matter more than you might expect.
Step 1: Warm the Engine
Run the engine for about 30 seconds to one minute. You want the oil warm enough to flow easily, but not hot enough to burn your arm. Cold oil drains slowly and leaves more old oil in the engine.
Hot oil can cause serious burns.
Warm oil also suspends more contaminants, so you drain them out with the oil rather than leaving them settled in the pan.
Step 2: Drain and Replace the Washer
Position the drain pan under the oil pan. Remove the fill cap on top of the engine first, this helps the oil drain faster by allowing air to enter the system.
Remove the drain plug with a 14mm wrench. Let the oil drain completely, which takes about five minutes. While it drains, inspect the old crush washer.
If it is flattened or has grooves, replace it.
Clean the drain plug threads and install the new crush washer. Torque to 29 ft-lbs. If you do not have a torque wrench, snug it by hand and give it a quarter turn with a standard wrench.
Do not gorilla-tighten it.
Step 3: Prime and Install the New Filter
For the V6 spin-on filter: fill the new filter about halfway with fresh oil before installing. This is called priming. It prevents the engine from running dry for the first few seconds after startup.
Rub a thin layer of oil on the rubber gasket with your finger so it seals properly and does not stick.
Hand-tighten the filter until the gasket contacts the mounting surface, then tighten by hand another three-quarter turn. Do not use a wrench for the final tightening unless the filter is in a difficult position. Over-tightening can damage the gasket or the filter housing.
For the 2.7L cartridge filter: install the new cartridge and O-ring according to the filter housing instructions. Most cartridge housings have a torque spec printed on them. Follow it.
Step 4: Fill Carefully
Now comes the part where the exact numbers matter.
For the 2.7L four-cylinder: pour in 4.5 quarts of 0W-20.
For the 3.5L V6: pour in 6.4 quarts of 0W-20.
Pour slowly. Use a funnel. Stop halfway through and check the dipstick.
The oil level should be somewhere between the low and full marks. If it looks low, add the remaining oil in quarter-quart increments, checking the dipstick each time.
Step 5: The Dipstick Reading Method That Actually Works
This step trips up more DIYers than any other.
Run the engine for about two minutes after filling. This circulates oil through the filter and fills the passages. Shut the engine off and wait three full minutes.
Pull the dipstick, wipe it clean, reinsert it fully, then pull it again and read the level.
The oil should be at or just below the full mark. If it is above the full mark, you overfilled. In that case, loosen the drain plug slightly and let out a small amount.
This is messy but necessary.
If the level is between the low and full marks, add a quarter quart and repeat the warm-up and reading process. It is better to add too little and need a second pour than to overfill and have to drain.
Common Mistakes That Kill Highlander Engines
You can follow every step to the letter and still mess up one detail that causes long-term damage. Here are the mistakes we see most often from owner forums and repair shop records.
Overfilling Aerates the Oil
Pouring in the full bottle without checking the dipstick is the number one error. The V6 takes 6.4 quarts, but if you buy a six-quart jug and a one-quart bottle, you might dump the whole second quart without pausing.
Overfill by half a quart and the crankshaft dips into the oil at high RPM. That whips air into the oil, creating foam. Foam does not lubricate.
Foam aerates and cavitates inside the oil pump, which drops pressure fast. The result is premature bearing wear and scored camshaft lobes.
Underfilling Starves the Bearings
The flip side is equally bad. If you fill to the old 6.1-quart spec on the V6, you are 0.3 quarts low. That might not trigger the low oil light, but it means the pickup tube sits closer to the surface during hard braking or steep highway grades.
A sustained low level allows the pump to suck air intermittently. Those micro-bursts of air cause momentary oil starvation in the connecting rod bearings. Over time, that creates knocking sounds that only get worse.
Using the Wrong Filter Causes Bypass Failure
The oil filter has a bypass valve. When the filter clogs from age or debris, the valve opens so oil continues circulating even if unfiltered. That is a safety feature.
Cheap filters sometimes have incorrect bypass valve pressure ratings. A valve that opens too early sends unfiltered oil through the engine. A valve that opens too late causes oil starvation at the filter.
Either scenario is bad for the 2GR-FE V6, which has tight oil galleries that rely on proper pressure.
Stick with a quality filter that matches the OEM bypass spec.
Stripping the Drain Plug
The oil pan on both engines is aluminum. The drain plug threads are cut directly into the soft metal. Over-torque the plug even once and you risk stripping the threads.
A stripped oil pan means a replacement pan or a thread repair insert. Both are expensive and messy jobs. Use a torque wrench set to 29 ft-lbs.
If you do not own one, snug the plug by hand and then give it a gentle quarter turn with a standard wrench. That is enough.
When to Change the Oil – Real Intervals for Real Driving
The owner's manual says 5,000 miles for normal service and 3,000 to 5,000 for severe service. But what does that mean in real life?
Normal Service vs. Severe Service
Toyota defines normal service as mostly highway driving at moderate speeds, moderate outside temperatures, and no towing. If that describes your commute, a 5,000-mile interval with synthetic 0W-20 is safe. Many owners push to 7,500 miles with good results, though that stretches the recommended limit.
Severe service includes short trips under five miles, stop-and-go city driving, extreme hot or cold weather, towing, or driving on dusty roads. Most daily commuters fall into this category whether they realize it or not.
If you drive three miles to work, park for eight hours, and drive three miles home, the engine never fully warms up. Condensation builds up in the oil. Fuel dilution increases.
In that case, change the oil every 3,000 to 4,000 miles regardless of what the sticker says.
How the Oil Life Monitor Actually Works
The 2010 Highlander has an oil maintenance light, not a true oil life monitor. It is a simple odometer-based counter that illuminates at preset mileage intervals. It does not measure oil condition, viscosity, or contamination.
Resetting the light is easy. Turn the key to the ON position without starting the engine. Press the trip meter reset button until the light blinks and goes out.
But do not rely on the light alone as a timing guide. Track your mileage manually or use a maintenance app.
Signs You've Got the Wrong Amount of Oil In Right Now
You do not always see the low oil pressure light in time. Here are the symptoms that tell you the oil level is off before the damage gets expensive.
Ticking or tapping at idle. This is the most common sign of low oil. The hydraulic lifters lose pressure and start clattering. The noise usually goes away as RPM rises, but it means the oil level is borderline.
Oil on the driveway. A small puddle under the front of the car could mean overfilling caused seal leakage. The rear main seal or valve cover gaskets can weep under excess crankcase pressure.
Blue smoke from the exhaust. This indicates oil is burning in the combustion chambers. Overfilling can push oil past the piston rings or valve seals. A small amount of blue smoke on startup is common on higher-mileage engines, but persistent smoke during driving means something is wrong.
Rough idle or hesitation. Low oil pressure can affect the variable valve timing system on the 2GR-FE V6. The cam phasers need consistent oil pressure to operate. Low level causes hesitation, especially during low-speed acceleration.
If you notice any of these signs, pull over and check the dipstick using the method described earlier. Do not drive far with a questionable oil level.
Should You DIY or Take It to a Shop?
This is a personal call, but here is how to decide based on your comfort level and tools.
DIY is a good fit if: you have a 14mm wrench, an oil filter wrench, a drain pan, and a flat surface to work on. You are willing to spend about 45 minutes. You want to save the shop labor fee, which runs around $30 to $60 on top of oil and filter costs.
You know which engine you have and the correct capacity.
A shop makes sense if: you do not have tools, you have no safe place to drain oil, or you prefer someone else to handle disposal. Some independent shops charge $70 to $90 total for a Highlander oil change with conventional oil. Synthetic 0W-20 adds another $10 to $20.
That is not a bad deal when you factor in not having to crawl under the car.
What to watch for at a shop. Not all shops check the engine code before filling. A hurried technician might pour 5 quarts into a V6 expecting a standard passenger car. That leaves you 1.4 quarts low.
Ask the shop what oil capacity they use for a 2010 Highlander V6 before they start. If they say 5 quarts, go somewhere else.
Aggregate reviews show that dealership oil changes for this model are generally reliable, but they cost more. Independent shops with good ratings are usually fine if you confirm they use the correct spec oil.
Final Verdict: The Numbers You Need to Memorize
If you only take away one thing from this guide, let it be these numbers.
For the 2.7L four-cylinder. Use 4.5 quarts of 0W-20 with a new filter. Check the dipstick after the first warm-up and top off if needed. Keep an eye on consumption between changes, especially as mileage climbs past 100,000.
For the 3.5L V6. Use 6.4 quarts of 0W-20 with a new filter. Ignore the old 6.1-quart figure. The Toyota service bulletin corrected that for a reason.
Fill to 6.4, run the engine for two minutes, wait three minutes, and confirm the dipstick reads at the full mark.
For both engines. Stick with 0W-20 as your primary oil. Use 5W-20 only if 0W-20 is unavailable. Replace the crush washer every time.
Torque the drain plug to 29 ft-lbs. Change the oil at 5,000 miles for normal driving or 3,000 to 4,000 miles for severe service.
The 2010 Highlander is a durable vehicle that rewards consistent maintenance. Get the oil right every time and you will see 200,000 miles without major engine work. It is that simple.