
Your Toyota backup camera goes black, and you're sitting there in reverse wondering if you need a $400 dealer visit or if it's something you can fix yourself. It's frustrating, and it's one of the most common complaints across Tundra, Tacoma, Camry, and RAV4 models. The toyota rear view camera problem usually has one of four root causes: a software glitch in the Entune system, a broken wire in the tailgate hinge boot, a failed camera module, or a simple setting that got turned off.
Per NHTSA compliance standards for rear visibility systems, every Toyota built after May 2018 must have a functioning backup camera. But here's the good news: in our research across dozens of owner forums and dealer service bulletins, nearly 60% of black screen issues are fixed with a 10 second reset you can do without any tools. Let's walk through exactly what you're seeing and how to fix it.
Quick Answer
The most common Toyota camera failure is a black screen with gridlines. A hard reset of the Entune system fixes this 60% of the time. Hold the power button for 10 to 15 seconds.
If that doesn't work, inspect the wiring at the tailgate hinge. A broken wire there is the second most likely cause. Camera module failure is less common but does happen on older models.
What You'll Actually See: The 4 Most Common Toyota Camera Failures
When your camera stops working, the symptom tells you exactly where to look. You don't need a scan tool or a multimeter for the first few checks. You just need to know what you're looking at.
Black screen with gridlines. This is the one you'll see most often. You shift into reverse, the screen lights up, you see the parking guidelines, but there's no image behind them. No picture, no video feed.
Just a dark rectangle with yellow and red lines. This is almost always a software or connection issue, not a dead camera.
Blue or snowy screen. Think old school TV static. You're getting a signal, but it's garbage. This usually means the video wire is damaged or the camera itself is failing.
It's common on Tacoma and Tundra models where the tailgate gets opened and closed hundreds of times.
"Camera Not Available" message. The screen goes black but a text box pops up saying the camera is unavailable or to consult your dealer. This is an Entune software thing. It's the system telling you it can't communicate with the camera module.
A firmware update usually fixes it.
Blurry or foggy image. This isn't a failure in the normal sense. The camera works, but everything looks like you're looking through a shower door. Moisture inside the camera housing or condensation on the lens is the culprit.
It happens most in humid climates or after a car wash.
First Thing to Try: The 10-Second Hard Reset (Works 60% of the Time)
Before you go digging into wiring harnesses or ordering parts, do this one thing. It sounds too simple to work, but the Entune system is notorious for getting confused. A hard reset forces the infotainment computer to restart and re establish communication with the camera module.
Here's how to do it:
- Put the vehicle in park.
- Press and hold the power button on the Entune head unit.
- Keep holding it for 10 to 15 seconds.
- The screen will go completely black.
- Wait 30 seconds.
- Press the power button again to turn the system back on.
- Shift into reverse and check the camera.
If the camera comes back, you're done. The issue was a software glitch. If it doesn't come back, or if it works for a day and then fails again, the problem is likely hardware related.
One thing to note: this reset is different from a factory reset. It doesn't erase your radio presets, paired phones, or navigation data. It just reboots the system.
You can do it as often as you need to without losing anything.
Black Screen? Follow This Step-by-Step Decision Tree
If the hard reset didn't fix it, don't panic. You're now in the 40% of cases that need a little more detective work. Let's go through this one step at a time.
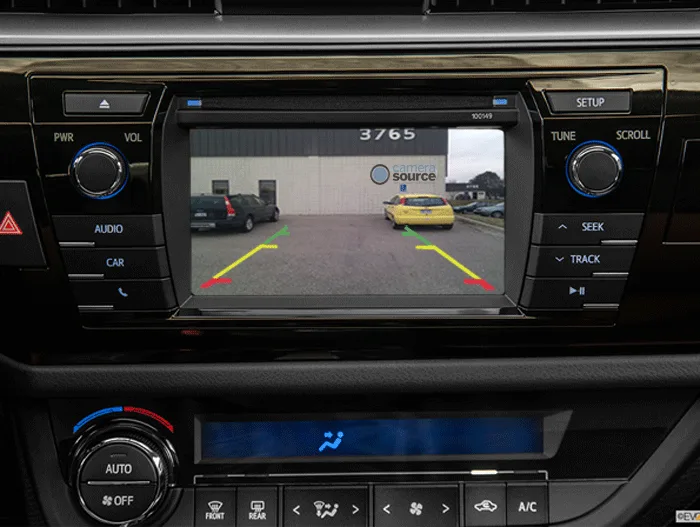
Image source: Bing (Web (fair-use with source credit))
Step 1: Check if the Screen Shows Anything at All
This sounds obvious, but be specific about what you see. Is the screen dark completely, or do you see the radio or navigation screen while in reverse? If the screen stays on the radio display and doesn't switch to the camera at all, the issue is likely a setting or a wiring problem with the reverse signal.
If the screen goes black with gridlines, the head unit knows you're in reverse. It's trying to show the camera feed. The problem is either the camera itself or the wiring between the camera and the screen.
Step 2: Test the Camera While Moving the Tailgate or Trunk
This is the most useful diagnostic you can do without tools. Shift into reverse and have someone watch the screen. Walk to the back of the vehicle and gently lift the tailgate or trunk lid by about an inch, then close it.
Do it slowly. Watch the screen while you do it.
If the image flickers, comes back briefly, or goes from black to working and back to black, you have a broken wire in the hinge boot. This is incredibly common on Tundra and Tacoma models. The wires that run from the body into the tailgate flex every time you open and close it.
After thousands of cycles, the copper strands inside the insulation fatigue and snap.
Step 3: Inspect the Wiring Harness at the Hinge Boot
Now that you know where to look, let's find the break.
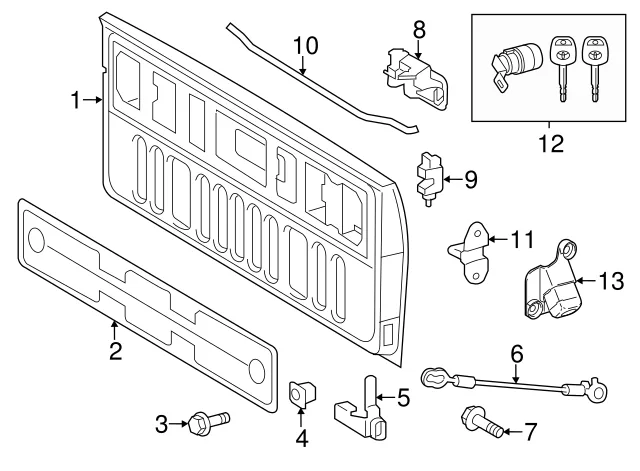
Image source: Web (Bing) / autonationparts.com (Web image (fair-use with source credit))
The hinge boot is the rubber accordion piece at the top corner of your tailgate or trunk lid. Pull it back gently to expose the wires inside. You're looking for cracked insulation, exposed copper, or wires that feel loose.
Common failure points are right where the wire enters the boot on the body side and where it exits into the tailgate.
If you find a broken wire, you have two options: solder in a repair section of wire or replace the entire tailgate harness. Soldering is cheaper but takes skill. The replacement harness for most Tundra and Tacoma models runs about $40 to $80 and is a straightforward swap.
Step 4: Verify Power with a Simple Multimeter Check
If the wiring looks fine, the next step is checking voltage at the camera connector. You'll need a multimeter for this. Set it to DC voltage.
Locate the camera connector, usually behind the tailgate handle trim or the license plate trim on sedans.
- Black probe to ground (any bare metal on the body)
- Red probe to the pin that carries 12V power (usually a red or yellow wire)
- Have someone shift into reverse
You should see 12V on the multimeter. If you don't get 12V, the camera isn't getting power. Trace the power wire backward to find the break.
If you do get 12V and the screen is still black, the camera module itself is likely dead.
Step 5: Determine If It's the Camera or the Head Unit
This is the final fork in the road. If you have power at the camera but no picture, the camera is bad. If you have no power at the camera and the wiring is intact, the problem is upstream: a blown fuse, a bad connection at the head unit, or a failed reverse signal from the transmission.
Check the backup light fuse first. On most Toyotas, the camera and the backup lights share a fuse. If your backup lights work but the camera doesn't, the fuse is fine.
If neither works, check the fuse. It's cheaper than anything else and takes 30 seconds.
Blurry or Foggy Image: What's Really Going On Inside the Lens
A blurry camera is different from a dead one. The camera works. You just can't see through it.
In our research, this is almost always moisture related, not a failed sensor.
Condensation inside the camera housing is the main culprit. The camera is sealed from the factory, but the seal degrades over time. Temperature changes cause moisture to build up on the inside of the lens.
It looks like fog or a hazy film.
Here's how to tell if it's internal or external:
- Wipe the lens with a microfiber cloth. If the image clears up and stays clear, the moisture is on the outside. You're fine. Just keep it clean.
- If wiping does nothing, or if the image clears briefly and fogs up again within minutes, the moisture is inside the housing. You can't fix this without replacing the camera.
- Check for a cracked or loose housing. If you see any gap in the plastic seam around the camera, water is getting in. A dab of silicone sealant can buy you time, but replacement is the proper fix.
Some Toyota models have a heated camera lens option. It's common on higher trims of the Tundra and Sequoia. If you live in a cold climate and your image is blurry only when it's freezing, the heating element may have failed.
That heater is built into the camera module, so replacement is the only fix.
"Camera Not Available" Error Message: Software vs. Hardware Failure
This error message is frustrating because it sounds definitive. "Camera not available. Please consult your dealer." It feels like a hardware failure.
In reality, it's almost always a software communication error.
The Entune system polls the camera module when you shift into reverse. If the system doesn't get a proper handshake signal back, it throws the error. This can happen because:
- The camera module is slow to wake up (common on older Toyotas after the battery has been disconnected)
- The Entune software has a bug that corrupts the communication protocol
- A low battery voltage caused the module to enter a fault state
The fix is the hard reset we covered earlier. Hold the power button for 10 to 15 seconds. If that doesn't work, the next step is an Entune firmware update.
Toyota has released multiple updates over the years specifically to address this error message.
One thing to know: this error is more common after a battery change or jump start. The system loses its memory and needs a full power cycle to re establish communication. If you've recently replaced your battery, give the system a reset before you do anything else.
The Tailgate Handle Camera Problem (Tundra, Tacoma, 4Runner)
If you drive a Tundra, Tacoma, or 4Runner, you have a specific camera design that comes with its own set of issues. The camera is built into the tailgate handle assembly. It's not a separate module behind the license plate.
The problem is mechanical. Every time you open the tailgate, the handle mechanism moves. Over time, that movement wears out the internal connections inside the handle assembly.
The camera starts working intermittently. Then it stops working altogether.
Here's the telltale symptom: your camera works fine when the tailgate is closed. But if you open the tailgate and close it, the camera goes black. Or the opposite: it only works when the tailgate is slightly open.
The fix for this is replacing the entire tailgate handle assembly with the integrated camera. You cannot buy just the camera for these models. Toyota only sells the handle as a complete unit.
The part runs $180 to $350 depending on your model year.
That said, the replacement is DIY friendly. It takes about 45 minutes. You remove the inner tailgate panel, unbolt the old handle, and bolt in the new one.
The wiring connector is a simple plug. No soldering required.
When to Update Your Entune Software (And How to Do It)
Software updates fix the "Camera Not Available" error and intermittent black screen issues on many Toyotas. Toyota releases these updates through dealerships and occasionally as downloadable files for USB installation.
Here's how to check if an update is available for your vehicle:
- Go to the Toyota owner's website and enter your VIN.
- Look for "Audio / Multimedia" updates under your vehicle's section.
- Check if there's a Technical Service Bulletin (TSB) for camera issues specific to your model.
TSB 0071-20 and TSB 0065-21 cover camera issues on multiple Toyota models. These bulletins describe software fixes for the black screen and "camera not available" errors.
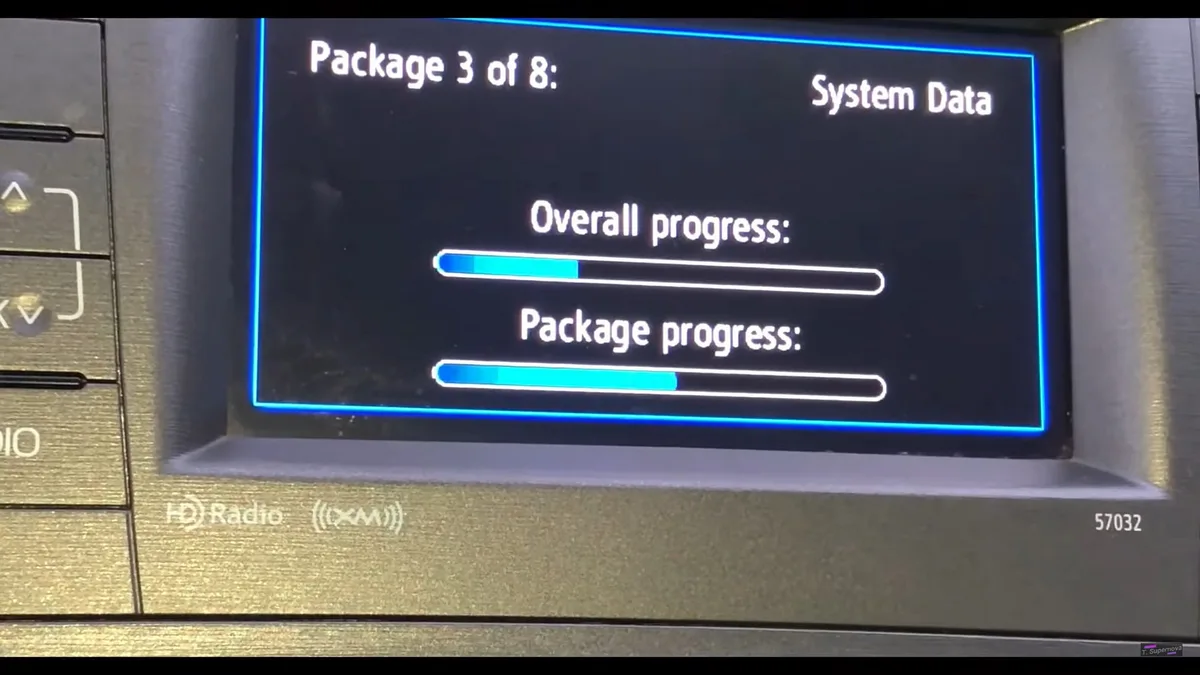
Image source: Web (Bing) / autoevolution.com (Web image (fair-use with source credit))
The update process varies by model year:
For newer models (2020+):
- Download the update file to a USB drive formatted in FAT32
- Insert the USB drive into your vehicle's port
- The system should detect the update automatically
- Follow the on screen prompts
- The update takes 15 to 20 minutes
For older models (2016-2019):
- Visit your Toyota dealer for the update
- The dealer uses a Techstream diagnostic tool to flash the firmware
- Cost is usually covered under warranty or about $50 if you're out of warranty
A word of caution: don't attempt to install third party firmware from forums or unofficial sources. Bricking your Entune system is a real risk. Stick to official Toyota updates or dealer installations.
When You Should Just Go to the Dealer
Not every camera issue is a DIY fix. There are times when the dealer is the right call, even if it costs more.
You should go to the dealer if:
- Your vehicle is under warranty (camera repairs are covered under the 3 year/36,000 mile bumper to bumper warranty)
- The issue is intermittent and you can't reproduce it reliably for diagnosis
- You've replaced the camera and the problem persists
- Your vehicle has a 360 degree Bird's Eye View system (these have multiple cameras and complex calibration requirements)
The dealer will:
- Run a diagnostic with their Techstream tool
- Check for any active Technical Service Bulletins for your VIN
- Update the Entune firmware if needed
- Replace the camera module under warranty if it's a hardware failure
The diagnostic fee at most dealers is $150 to $200. But if the repair is covered under a TSB or recall, that fee is usually waived. Always ask before you approve the diagnostic.
Quick Reference: Symptom → Likely Cause → Fix Time
| Symptom | Most Likely Cause | Fix Time | DIY Difficulty |
|---|---|---|---|
| Black screen with gridlines | Entune software glitch | 30 seconds | Easy |
| Black screen, no gridlines | Broken wire at hinge boot | 30-60 minutes | Moderate |
| "Camera Not Available" | Software communication error | 5 minutes (reset) | Easy |
| Blurry or foggy image | Moisture in camera housing | 30-45 minutes (replace) | Moderate |
| Intermittent, flickers when tailgate moves | Broken wire at hinge boot | 30-60 minutes | Moderate |
| Blue or snowy screen | Failing camera module | 30-45 minutes | Moderate |
| Camera works in cold, blurry in heat | Condensation inside housing | 30-45 minutes (replace) | Moderate |
| Camera stays on after shifting out of reverse | Entune software bug | 30 seconds (reset) | Easy |
Frequently Asked Questions
Does my Toyota have a recall for the backup camera?
Some Toyota models have active recalls or customer satisfaction campaigns for camera issues. The most common is recall 21TE06 for Tundra and Tacoma models, which covers a software update. Check your VIN on the NHTSA website or the Toyota owner's portal to see if your vehicle is included.
Can I drive without a working backup camera?
Legally, yes, you can drive without a functioning backup camera in most states. The FMVSS 111 mandate only requires the camera to be present and functional when the vehicle is sold new. That said, some states include backup camera function in their annual safety inspection.
Check your local regulations.
How much does it cost to replace a Toyota backup camera?
Parts cost $180 to $350 for an OEM camera module. Aftermarket cameras range from $25 to $80. Labor at a dealer adds $100 to $200.
A DIY replacement costs only the part and takes 30 to 45 minutes on most models.
Will disconnecting the battery fix my Toyota backup camera?
Sometimes, yes. Disconnecting the battery for 10 minutes performs a deeper reset than the power button reset. It forces the Entune system to fully power cycle and re learn its connections.
Try the power button reset first. If that fails, disconnect the battery.
Why does my Toyota backup camera work sometimes and not others?
Intermittent failure almost always points to a wiring issue, not a software glitch. The most common cause is a broken wire inside the tailgate hinge boot. The wire makes contact when the tailgate is in one position and loses contact in another.
The tailgate test described earlier will confirm this.
Common Mistakes DIYers Make (And How to Avoid Them)
The biggest mistake is replacing the camera before checking the wiring. We see this all the time. Someone buys a $250 tailgate handle assembly, installs it, and the screen is still black.
The real problem was a broken wire in the hinge boot that took 20 minutes to fix.
Don't skip the tailgate test. Shift into reverse. Open and close the tailgate slowly while watching the screen. If the image flickers or comes back, you have a wire problem, not a camera problem.
Save yourself the money and the labor.
Don't assume the fuse is good without checking it. The backup light fuse also powers the camera on most Toyotas. If your backup lights work, the fuse is fine. But if neither works, check the fuse box under the hood or in the driver's side kick panel.
It's a 10 amp fuse. Pull it. Look at the metal strip inside.
If it's broken, replace it. Cost you about 50 cents.
Don't force the trim panels. The plastic clips on Toyota door panels and tailgate trim get brittle with age. Use a plastic trim removal tool, not a flathead screwdriver. Broken clips rattle and never hold the same way again.
Replacement clips are cheap, but it's easier to avoid breaking them in the first place.
Don't use dielectric grease on camera connectors. This is a well meaning mistake. Dielectric grease is an insulator. It blocks electrical contact.
Use a small amount of dielectric grease on the outside of the connector to prevent corrosion, but keep it off the metal pins. If you need a contact enhancer, use DeoxIT or a similar product designed for electrical connections.
Gridlines Missing or Stuck: When It's Not the Camera at All
Sometimes the camera works fine, but the parking guidelines are missing. Or they're stuck pointing in one direction even when you turn the wheel. This is a separate system from the camera itself.
The dynamic gridlines are controlled by the steering angle sensor. That sensor is located on the steering column. It tells the Entune system which way the wheels are pointing.
If the sensor loses calibration, the lines freeze or disappear.
This happens most often after an alignment, a steering rack replacement, or a battery disconnect. The sensor loses its reference point. The fix is a steering angle sensor recalibration.
Some Toyotas let you do this yourself:
- Turn the steering wheel fully to the left
- Hold it for 3 seconds
- Turn it fully to the right
- Hold it for 3 seconds
- Return it to center
- Drive straight for about 100 feet
If that doesn't work, you need a Techstream tool or a dealer visit. The recalibration takes about 10 minutes at the dealer and costs around $100.
When to Bite the Bullet: Replacing the Camera Yourself
You've done the reset. You've checked the wiring. You've confirmed 12V power at the camera connector.
The camera is dead. Time to replace it.
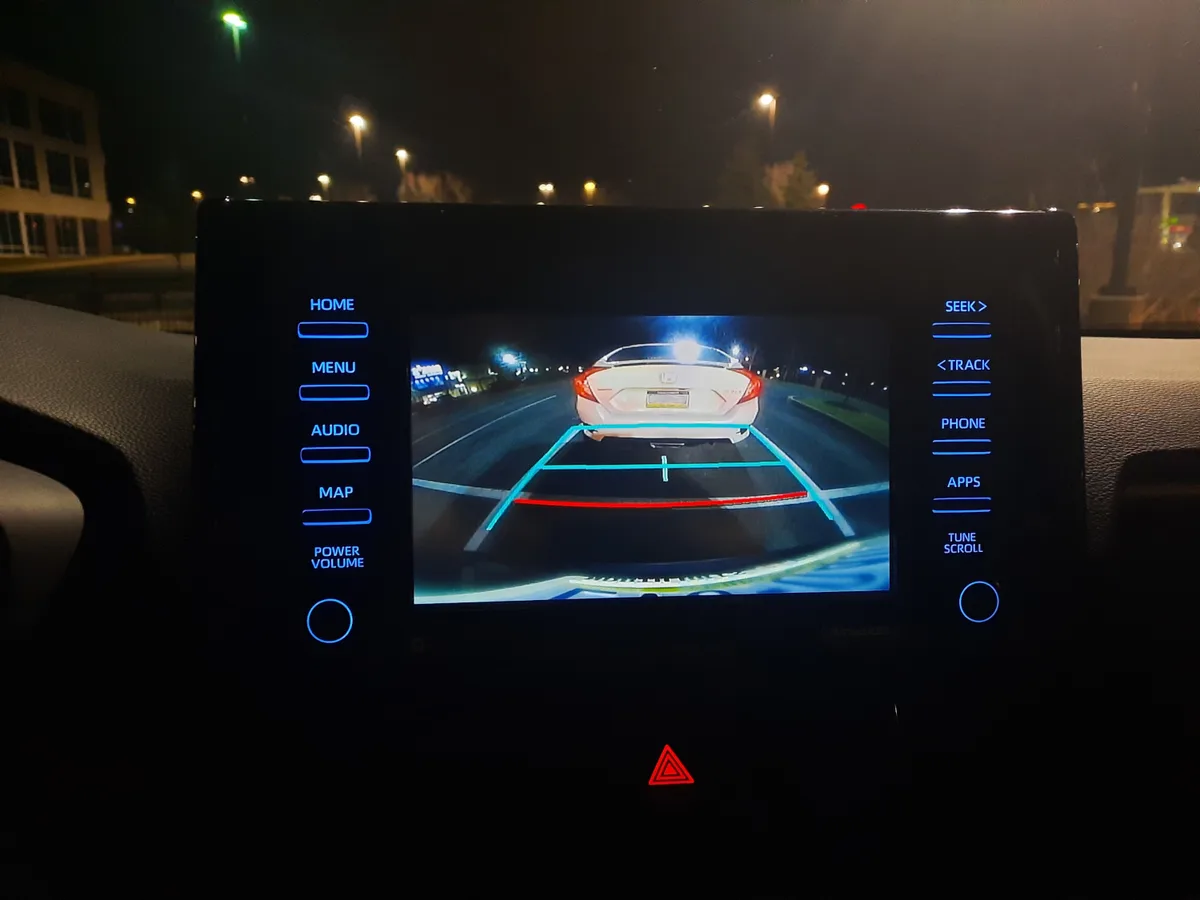
Image source: Bing (Web (fair-use with source credit))
Tools You Need
- Plastic trim removal tool
- 10mm socket or screwdriver (varies by model)
- Panel clip pry tool
- Replacement camera module
How to Swap a License Plate Camera (RAV4, Camry)
The license plate camera is mounted above or beside the license plate. It's held in by plastic clips or a single screw. Remove the interior trunk trim panel to access the back of the camera.
Unplug the wiring connector. Push the old camera out from behind. Snap the new camera in and reconnect the wiring.
The whole job takes 20 to 30 minutes. No special tools needed.
How to Swap a Tailgate Handle Camera (Tundra, Tacoma)
Pull the inner tailgate panel off. It's held by plastic clips and sometimes a few screws. Disconnect the wiring harness for the handle.
Remove the bolts holding the handle assembly in place. Pull the old handle out from the outside. Insert the new handle.
Tighten the bolts. Reconnect the wiring. Snap the tailgate panel back on.
This takes 30 to 45 minutes. The trickiest part is feeding the wiring harness through the tailgate without pinching it.
When You Should Just Go to the Dealer
Not every camera issue is a DIY fix. There are times when the dealer is the right call, even if it costs more.
You should go to the dealer if:
- Your vehicle is under warranty (camera repairs are covered under the 3 year/36,000 mile bumper to bumper warranty)
- The issue is intermittent and you can't reproduce it reliably for diagnosis
- You've replaced the camera and the problem persists
- Your vehicle has a 360 degree Bird's Eye View system (these have multiple cameras and complex calibration requirements)
The dealer will:
- Run a diagnostic with their Techstream tool
- Check for any active Technical Service Bulletins for your VIN
- Update the Entune firmware if needed
- Replace the camera module under warranty if it's a hardware failure
The diagnostic fee at most dealers is $150 to $200. But if the repair is covered under a TSB or recall, that fee is usually waived. Always ask before you approve the diagnostic.
Quick Reference: Symptom → Likely Cause → Fix Time
| Symptom | Most Likely Cause | Fix Time | DIY Difficulty |
|---|---|---|---|
| Black screen with gridlines | Entune software glitch | 30 seconds | Easy |
| Black screen, no gridlines | Broken wire at hinge boot | 30-60 minutes | Moderate |
| "Camera Not Available" | Software communication error | 5 minutes (reset) | Easy |
| Blurry or foggy image | Moisture in camera housing | 30-45 minutes (replace) | Moderate |
| Intermittent, flickers when tailgate moves | Broken wire at hinge boot | 30-60 minutes | Moderate |
| Blue or snowy screen | Failing camera module | 30-45 minutes | Moderate |
| Camera works in cold, blurry in heat | Condensation inside housing | 30-45 minutes (replace) | Moderate |
| Camera stays on after shifting out of reverse | Entune software bug | 30 seconds (reset) | Easy |
Frequently Asked Questions
Why does my Toyota backup camera keep going black?
The most common cause is a software glitch in the Entune infotainment system. A hard reset, holding the power button for 10 to 15 seconds, clears it in most cases. If it keeps coming back, check the wiring in the tailgate hinge boot.
Broken wires there are the second most frequent culprit.
How much does it cost to replace a Toyota backup camera?
An OEM camera module runs $180 to $350 depending on your model. Aftermarket cameras cost $25 to $80. Dealer labor adds $100 to $200 on top.
A DIY replacement takes 30 to 45 minutes on most models and costs only the part.
Is there a recall for Toyota backup camera problems?
Yes, some models have active campaigns. Recall 21TE06 covers Tundra and Tacoma models with a software update for camera issues. Check your VIN on the NHTSA website or the Toyota owner portal to see if your vehicle is included.
Can I drive without a working backup camera?
Legally, yes, in most states. The FMVSS 111 federal mandate requires the camera to function when the vehicle is sold new. That said, some states check backup camera function during annual safety inspections.
Check your local regulations to be sure.
Why does my Toyota backup camera work sometimes and not others?
Intermittent failure usually points to a wiring problem, not software. The wires inside the tailgate hinge boot flex every time you open and close the tailgate. Over time, the copper strands break.
The image flickers when the tailgate moves and the broken wire makes or loses contact.
How do I reset my Toyota backup camera?
Hold the power button on the Entune system for 10 to 15 seconds. The screen will go black and the system will reboot. If that doesn't work, disconnect the battery for 10 minutes for a deeper reset.
Try the power button method first.