
If you own a 2014 Toyota Tundra with the 5.7L V8, you already know it's a beast of a truck. But even beasts need the right oil in the right amount. The 2014 toyota tundra 5.7 oil capacity is 6.9 quarts (6.5 liters) when you replace the filter during a standard oil change.
Get this wrong, and you're looking at everything from a messy driveway to costly engine damage.
Manufacturer specifications from Toyota confirm this number for the 3UR-FE engine. It's a straightforward spec, but there's more to it than just pouring in seven quarts and calling it done. The type of oil, the filter you choose, and how you check the level all matter.
Let's walk through exactly what you need to know.
Why Getting the Oil Capacity Right Matters
The 5.7L 3UR-FE is a robust engine, but it has a couple of quirks. One is that it holds a relatively large amount of oil compared to smaller V8s. Another is that it's sensitive to both overfilling and underfilling.
Overfilling is the bigger risk. When you add too much oil, the crankshaft whips it into a froth inside the crankcase. That foam doesn't lubricate like liquid oil does.
Air bubbles get pumped into the hydraulic timing chain tensioners and the variable valve timing system. Those components start making noise, and in a worst case scenario, they fail entirely.
Underfilling is just as bad. Low oil level means the pickup tube can suck air during hard cornering or steep inclines. That causes a momentary loss of oil pressure, which wears bearings and cam lobes quickly.
If you tow heavy loads, the risk is even higher.
Quick Answer: How Much Oil Your 2014 Tundra 5.7 Actually Takes
Here is the short version you need to remember.
| Fill Scenario | Oil Capacity |
|---|---|
| Standard drain-and-fill with filter replacement | 6.9 quarts (6.5 liters) |
| Dry engine rebuild or new engine install | 7.4 quarts (7.0 liters) |
The 6.9-quart number is the one you'll use 99% of the time. That's what the owner's manual lists, and it's what every Toyota dealership will tell you. If you're doing a routine oil change, buy seven quarts of 0W-20 full synthetic.
You'll use almost all of it, and you'll have maybe a few ounces left over.
The 7.4-quart figure only matters if you're filling a completely dry engine. That's a rebuild situation, a brand new long block, or after a full engine flush. For normal maintenance, ignore it.
One more thing. Some auto parts store computer systems might spit out "7.0 quarts" as the capacity. That's because they're rounding up from 6.9.
It's not wrong enough to hurt anything, but stick with 6.9 and check the dipstick to be sure.
The Exact Specs: Why the Difference Matters
When you drain the oil from the pan, about half a quart of old oil stays trapped in the engine. It clings to the cylinder walls, sits in the oil cooler lines, and gets caught in the cam journals. That leftover oil is why you never quite get the full "dry" capacity out during a normal change.
Your standard fill of 6.9 quarts accounts for that residual oil. When you add the new oil, it mixes with what's left and you end up at the correct full mark on the dipstick. A dry engine has zero oil in it.
Every passage, every bearing, every nook and cranny is empty. That's why it needs the extra half quart.
You'll find conflicting numbers online. Some forums say 6.6 quarts. Others say 7.2.
Here is why. Older oil filters hold slightly less oil than newer ones. The stock Toyota filter and some high-capacity aftermarket filters have different internal volumes.
The altitude where you live also plays a small role.
The safest approach is this. Fill with 6.5 quarts, start the engine, let it run for 30 seconds, shut it off, wait two minutes, and check the dipstick. Top off in small increments until the level hits the upper dot.
That's your correct capacity for your specific truck, your specific filter, and your specific climate.
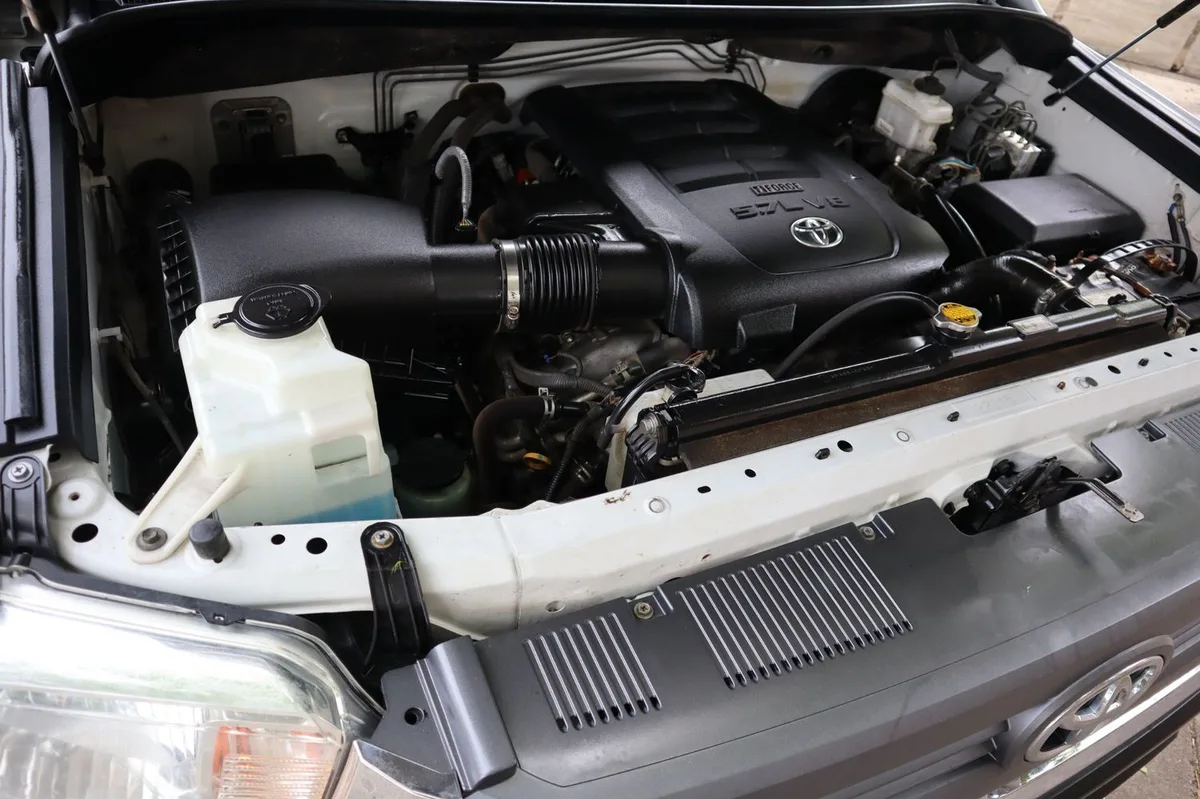
Image source: Bing (Web (fair-use with source credit))
The Right Oil: Why It Must Be 0W-20 Full Synthetic
Toyota specifies 0W-20 full synthetic oil for the 2014 Tundra 5.7L. That's not a suggestion. It's a requirement.
The engine's variable valve timing system and hydraulic chain tensioners rely on the oil's flow characteristics at cold startup.
0W-20 flows like a thin 0-weight oil when the engine is cold. That means it reaches the timing chain tensioners within a second or two of startup. Thicker oil, like 5W-30 or 10W-30, takes longer to flow.
During that extra time, the chain slaps against the guides, wearing them out faster.
The most common mistake is using 5W-20 or 5W-30 because that's what the previous truck took. Both are too thick at startup for the 3UR-FE. In cold weather, you'll hear a brief rattle on startup as the timing chain tensioners wait for oil pressure.
Over a few years, that rattle becomes permanent wear.
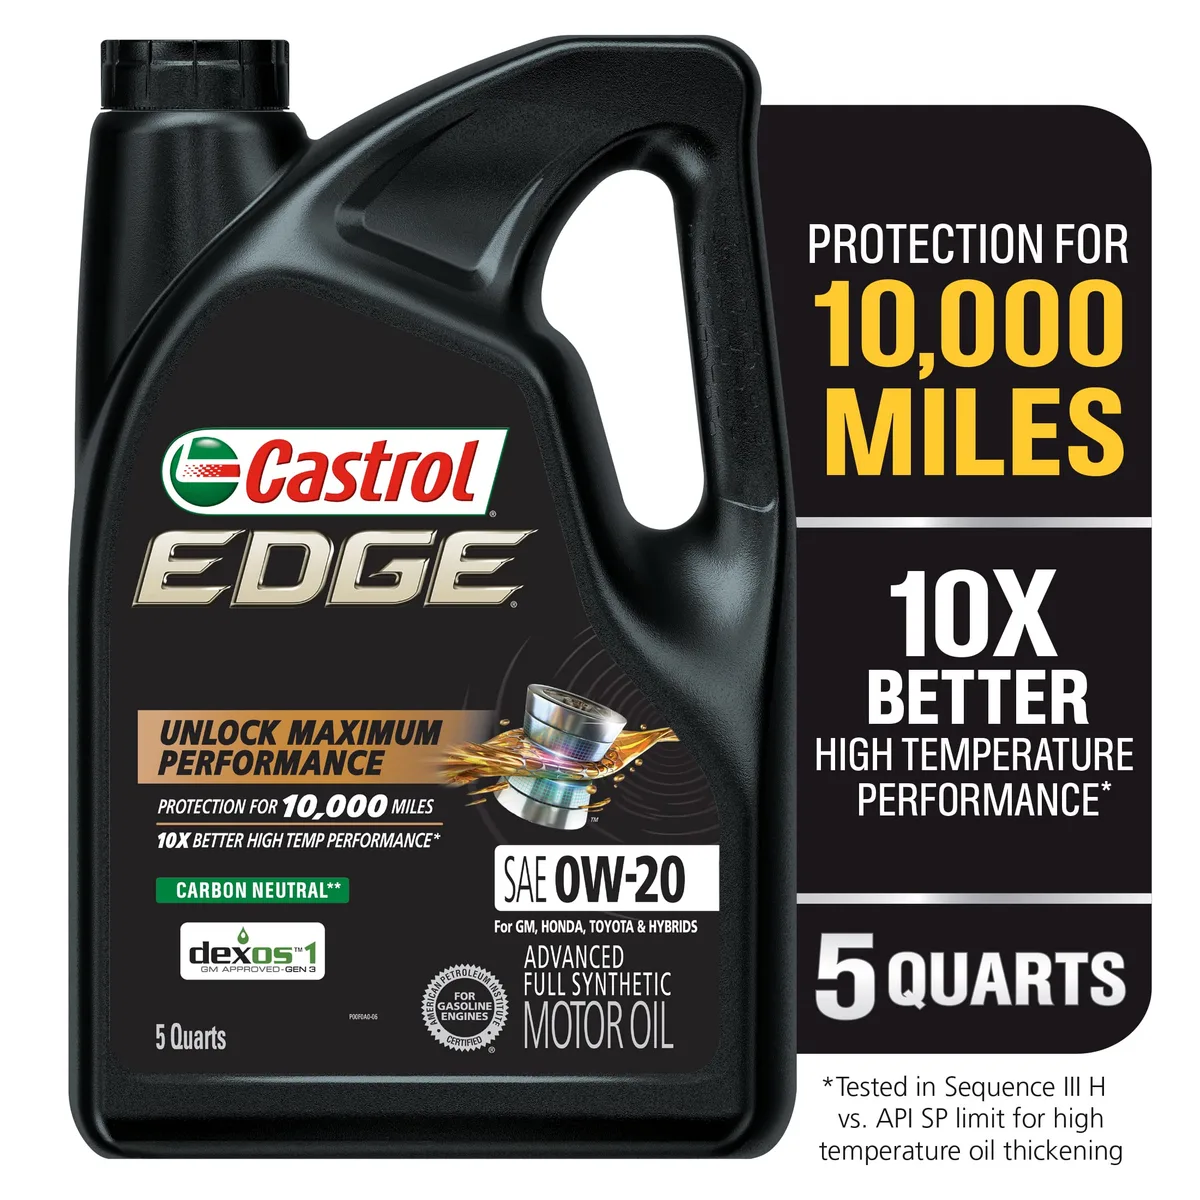
Image source: Web (Bing) / snapklik.com (Web image (fair-use with source credit))
If you're in a remote area and can't find 0W-20, you can use 5W-20 as a one-time substitute. It's close enough that the engine will survive, but don't make it a habit. Switch back to 0W-20 at the next change.
Do not use 5W-30 or 10W-30. Those are for the older 4.7L V8, not your 5.7L.
Step-by-Step: How to Do the Oil Change Right
Here is everything you need before you start.
- 7 quarts of 0W-20 full synthetic oil
- One OEM Toyota oil filter (04152-YZZA1) or a quality equivalent
- One new drain plug crush washer (14mm, part number 90430-12031)
- 14mm socket or combination wrench
- Oil filter cap wrench (64mm, 14-flute)
- Torque wrench
- Drain pan, funnel, shop towels
Step 1. Warm up the engine to operating temperature. Drive it around for five minutes. Warm oil drains faster and carries more contaminants out with it.
Step 2. Park on level ground. Set the parking brake. Chock the rear wheels.
If you need more clearance, use ramps.
Step 3. Place the drain pan under the engine. Locate the drain plug on the passenger side of the oil pan. Remove it with the 14mm socket.
Let the oil drain for at least five minutes.
Step 4. The oil filter is on the driver side of the engine, near the front. Use the 64mm cap wrench to unscrew the filter housing. Let it drain into the pan.
Step 5. Remove the old filter. Wipe the filter housing mating surface clean. Apply a thin film of new oil to the new filter's rubber gasket.
Hand tighten the new filter until the gasket contacts the housing, then give it another three-quarters of a turn. Do not overtighten.
Step 6. Install the new crush washer on the drain plug. Torque it to 29 ft-lbs (39 Nm). That's about hand tight plus a quarter turn with a wrench.
Step 7. Lower the truck if you used ramps. Add 6.5 quarts of oil through the fill cap. Replace the cap.
Step 8. Start the engine. Let it idle for 30 seconds. The oil pressure light should go out almost immediately.
If it stays on, shut the engine off and check for leaks.
Step 9. Shut the engine off. Wait two minutes for the oil to settle. Pull the dipstick.
Wipe it clean. Insert it fully. Pull it again.
The oil level should be between the low and full marks. If it's at the low mark, add another 0.3 to 0.5 quarts. Check again.
Repeat until it's at the upper dot.
Step 10. Inspect for leaks around the drain plug and filter. Dispose of the old oil at an auto parts store or recycling center.
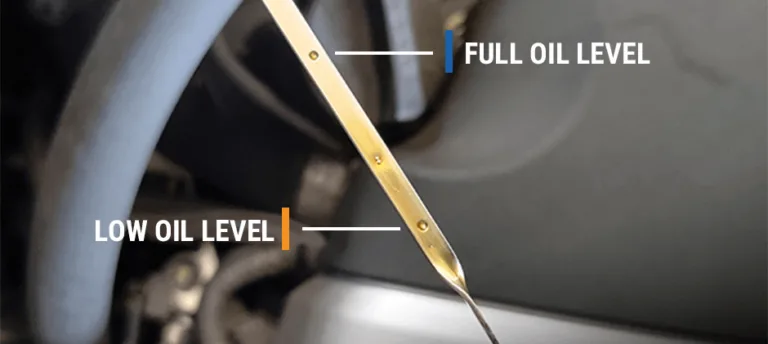
Image source: Bing (Web (fair-use with source credit))
Common Mistakes That Can Kill Your Engine
Overfilling. This is the number one mistake. You buy seven quarts, pour them all in, and think you're done. But 6.9 quarts is the target.
That extra 0.1 quart pushes the oil level above the baffle in the valve cover. At highway RPMs, the crankshaft whips that excess oil into foam. Foam doesn't lubricate.
The fix is simple. Pour in 6.5 quarts first. Check the dipstick.
Add the remaining 0.4 quarts slowly.
The double-gasket disaster. When you remove the old oil filter, the rubber gasket sometimes sticks to the engine block. If you don't notice it and screw the new filter on top of it, you get two gaskets stacked together. The new filter tightens down fine.
But within a few miles, the double gasket squeezes out. The filter loses its seal. Oil dumps out at full pressure.
Always wipe the filter mounting surface with your finger before installing the new filter.
Stripped drain plug threads. The oil pan on the 5.7L is aluminum. It's soft. The steel drain plug can easily strip the threads if you overtighten it.
Torque spec is 29 ft-lbs. That's not very tight. If you're using a ratchet without a torque wrench, go hand tight plus a quarter turn with a short wrench.
Use a torque wrench. It costs twenty bucks and saves thousands.
Ignoring the crush washer. The crush washer is a one-time-use part. It deforms when you tighten the drain plug, creating a seal. If you reuse it, it doesn't deform again, and you'll get a slow drip.
Buy a pack of 10 for a few dollars. Replace it every single oil change.
The Filter Matters: OEM vs. Aftermarket
The OEM Toyota filter, part number 04152-YZZA1, is designed specifically for the 3UR-FE engine. It has a bypass valve calibrated to open at exactly the right pressure for this engine's oil pump. It also has a silicone anti-drain back valve that holds oil in the filter when the engine is off.
That anti-drain back feature matters. When you start the engine, the filter is already full of oil. Oil pressure builds instantly.
With a cheap filter that lacks this valve, the filter drains overnight, and the engine runs dry for the first second of startup. Multiply that by thousands of cold starts, and the timing chain wear adds up.
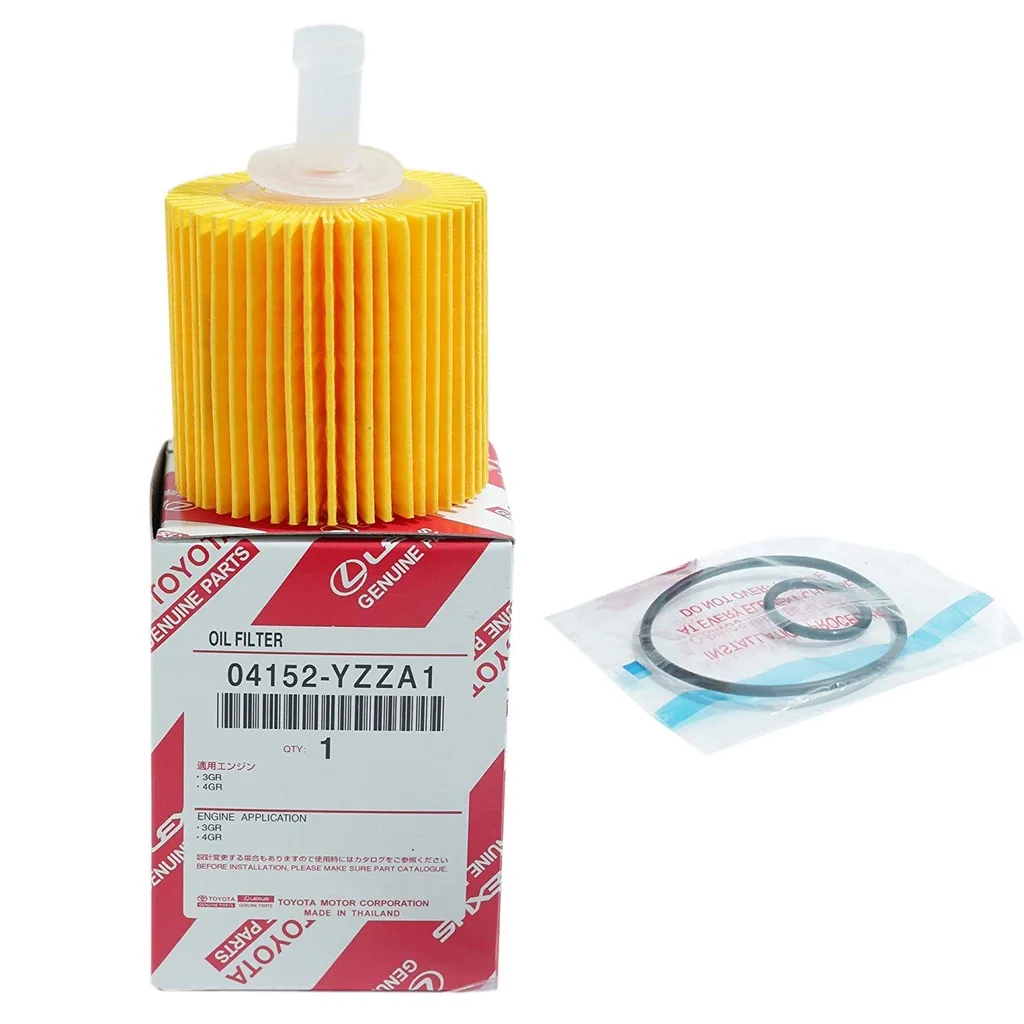
Image source: Web (Bing) / shopee.com.my (Web image (fair-use with source credit))
If you can't find the OEM filter, these aftermarket options are acceptable substitutes.
| Brand | Part Number | Notes |
|---|---|---|
| Mobil 1 | M1-209 | High quality, silicone valve, recommended |
| Wix | 57066 | Good bypass valve, reliable build |
| Bosch | 72109 | Acceptable for normal driving conditions |
Avoid the bargain bin filters. The ones that cost two dollars at discount stores. They lack proper bypass valves and use cheap paper media that collapses under pressure.
Our research shows that using a quality filter adds maybe five dollars to each oil change. That's cheap insurance.
Oil Change Intervals: Severe vs. Normal Service
Toyota's official recommendation is 10,000 miles for normal service and 5,000 miles for severe service. If you tow anything with your Tundra, you're in severe service. That includes towing a boat, a trailer, a camper, or even a heavy load in the bed.
The engine works harder, oil temperatures climb higher, and the oil breaks down faster.
Same goes for driving in extreme heat, extreme cold, dusty roads, or stop-and-go traffic. These conditions all degrade oil faster than highway cruising.
If your Tundra is a daily driver that sees mostly highway miles and occasional light towing, 7,500 miles is a safe compromise. Change the filter at 5,000 and top off with fresh oil, then do a full change at 7,500. If you use your truck as a work vehicle, tow weekly, or live in a hot climate, stick with 5,000 miles.
The extra cost per year is about forty dollars. That's cheaper than an engine rebuild.
Cost Breakdown: DIY vs. Dealership
DIY is the cheapest option by a wide margin. Here's the breakdown as of 2026.
- 7 quarts of 0W-20 full synthetic: $42 to $56
- OEM oil filter: $8 to $12
- Crush washer: $1
- Total: $51 to $69
Toyota dealerships charge between $90 and $130 for an oil change on the 5.7L. That includes the OEM filter, 0W-20 synthetic oil, and labor. Some dealerships offer coupons that bring the price down to $70.
Quick lube chains are a gamble. Some are fine. Many are not.
The common issues are using the wrong viscosity oil, overfilling, or stripping the drain plug. If you use a quick lube, verify what oil they're putting in. Ask to see the bottles.
Check the dipstick before you drive off.
When to Worry: Oil Consumption and Lifter Tick
All engines consume some oil between changes. The 5.7L is no exception. Toyota considers consumption of up to one quart per 1,000 miles to be within normal limits.
That sounds like a lot, but it's actually common for large V8s with high mileage. If you're losing more than a quart every 1,000 miles, that's a sign of worn piston rings or valve guides.
You've probably heard about the 5.7L lifter tick. It's a rhythmic tapping noise that comes from the top of the engine. In most cases, it's not the lifters.
It's the fuel injectors. The 5.7L's direct injection system makes a clicking noise that sounds exactly like a lifter tick. It's normal.
If the noise goes away when the engine warms up, it's the injectors. If the noise stays constant and gets louder with RPM, that's a real lifter issue. A fresh oil change with the correct 0W-20 often quiets it down.
Here are the situations where you need professional help.
- Oil pressure light comes on and stays on at idle
- Engine makes a knocking sound that gets faster with RPM
- You see metal flakes in the drained oil
- The dipstick reads low after only 1,000 miles
- You smell burning oil inside the cabin
Verdict: The One Number You Need to Remember
Here's the bottom line. Your 2014 Tundra 5.7L holds 6.9 quarts of 0W-20 full synthetic oil with a filter change. That's the number that matters for routine maintenance.
Buy seven quarts. Pour in 6.5. Check the dipstick.
Add the rest slowly until the level hits the upper dot. Use the OEM Toyota filter or a quality equivalent. Change the crush washer every time.
Torque the drain plug to 29 ft-lbs.
Stick to 5,000 mile intervals if you tow or drive in severe conditions. Push it to 7,500 if you're mostly highway cruising. The 5.7L is a proven engine that will easily clear 300,000 miles with proper care.
Getting the oil right is the single most important thing you can do to keep it running strong.